Rootbound Nursery Plants: Check Roots Before Planting
A nursery plant can look full and healthy above the soil while its roots are already circling tightly inside the container. Checking rootbound nursery plants before planting helps you avoid slow growth, poor anchoring, and long-term damage.
Some circling roots are easy to correct. Others have become woody, girdled, rotten, or badly damaged, and choosing another plant is the better decision. A careful inspection takes only a few minutes and can protect the time and money invested in your landscaping.
Why Rootbound Nursery Plants Need Attention
Roots should spread outward and downward after planting. When they spend too long pressed against a container, they may circle around the root ball instead. The plant can survive in that shape for a while, but those roots may continue growing in the same pattern after installation.
A tight root system also dries out faster near the outside of the root ball. Water may run around the compacted mass instead of soaking through it. As a result, a newly planted shrub or palm can struggle even when the surrounding soil stays damp.
How Rootbound Problems Start
A plant becomes rootbound when its roots fill the available container space. Fast-growing plants and specimens kept in small pots are more likely to develop this problem. Roots may form a thick outer mat, especially at the bottom and along the container walls.
The issue can affect shrubs, palms, ornamental grasses, trees, and many flowering plants. A few visible circling roots don't automatically mean the plant is unusable. The amount, location, and condition of the roots matter more than the label on the pot.
Why Root Shape Matters After Planting
Roots that circle the trunk or stem can gradually restrict growth. A girdling root may press into the main stem as it gets thicker, limiting the movement of water and nutrients. Roots that remain packed together also have trouble making contact with the surrounding soil.
A plant with a modest outer root mat may recover well after correction, while one with girdling roots around its stem may carry damage for years.
How to Inspect rootbound nursery plants before planting
Inspect the plant before you buy it if the nursery allows you to remove the container. For a plant you already own, check the roots before placing it in the ground. Choose a shaded work area so the exposed roots don't dry in direct sun or wind.
Check the container and plant canopy
Start with the container. Roots growing out of the drainage holes indicate that the plant has filled much of the pot. You may also see roots pressed against the soil surface or exposed where the potting mix has settled.
Next, look at the plant itself. A healthy canopy doesn't prove that the roots are healthy, but wilted leaves, yellowing, weak new growth, or a loose stem deserve closer attention. Check for pests, broken branches, and signs of disease at the same time.
Avoid selecting a plant with a trunk or stem that moves separately from the root ball. That movement can indicate broken roots or a damaged connection below the soil.
Remove the root ball safely
Never pull a plant out by its stem, trunk, or branches. That force can break the crown, tear roots, or separate the plant from the root ball.
For a small plant, place one hand under the soil and root ball while you tip the container sideways. Use the other hand to slide the container away, rather than tugging on the plant. If the root ball sticks, squeeze or tap the sides and bottom of the pot.
For a larger shrub or tree, lay the container carefully on its side. Support the root ball with both hands or ask another person to help support the container itself. Work slowly until the plant slides free.
If the soil falls apart immediately, check whether the roots hold the mass together. A few loose roots aren't always a problem, but widespread breakage may indicate drying, rot, or poor root health.
Signs a Circling Root System Can Be Corrected
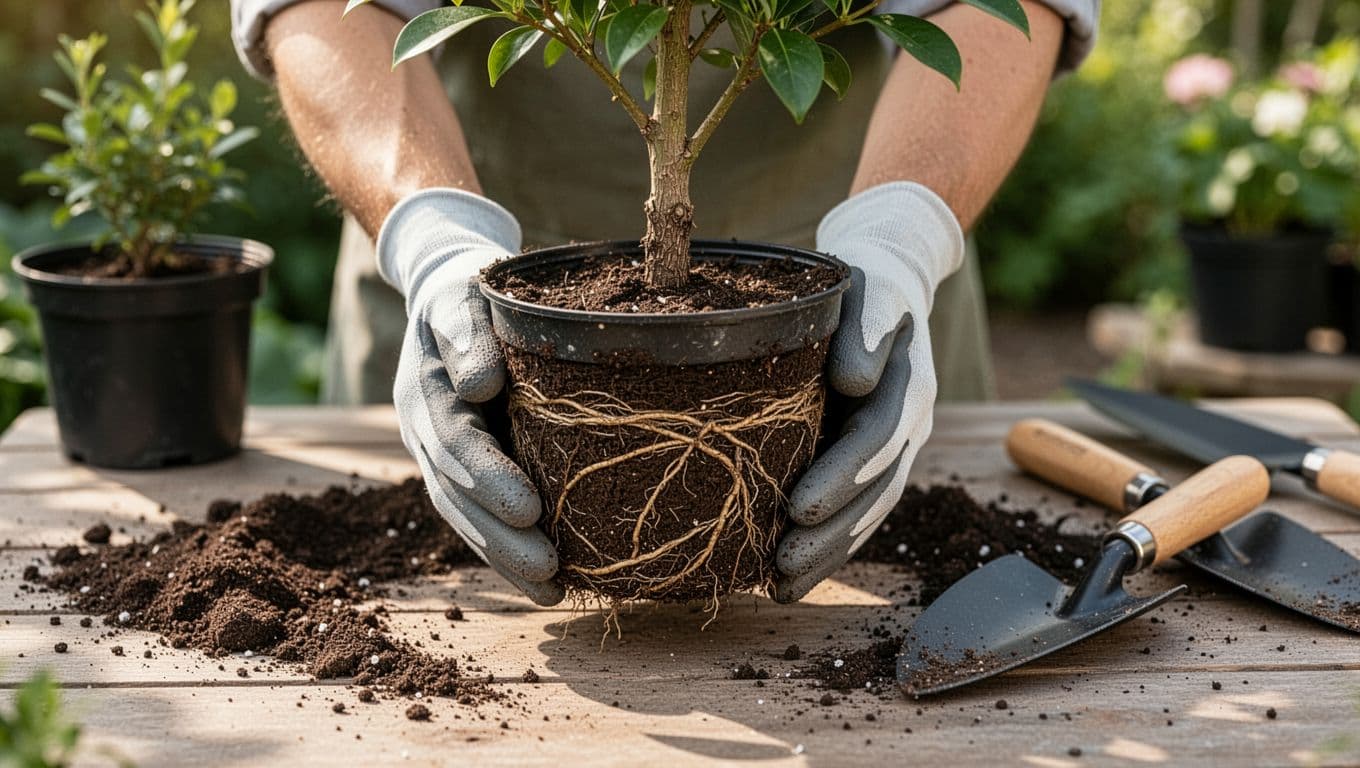
Once the container is off, inspect the outer surface, bottom, and top of the root ball. Look for the direction of the roots as well as their texture and color. Healthy roots vary by plant, but they generally feel firm rather than slimy or hollow.
Mild and moderate circling
A plant may be worth keeping when only a few roots circle the outside of the root ball. You can usually loosen these roots by hand before planting. A thin layer of roots along the container wall is also less concerning when the inner root ball remains firm and intact.
Moderate circling may still be corrected if the roots are flexible and haven't wrapped around the stem. Open the outer roots, spread them away from the center, and guide them into the surrounding soil.
The bottom of the root ball often needs extra attention. Roots can form a dense pad beneath the plant, so don't inspect only the sides.
When the root system is too damaged
Choose another plant when you find severe girdling, widespread rot, or major root breakage. Pay close attention to roots crossing around the main stem, trunk, or root flare. A single small crossing root may be removable, but several thick roots wrapped tightly around the base create a serious structural concern.
Other warning signs include:
- Roots that are black, mushy, hollow, or have a sour smell.
- A root ball that has collapsed and lost most of its healthy roots.
- Thick woody roots circling several times with little flexible growth.
- Roots cut, torn, or dried across much of the outer surface.
- A plant that wobbles because the trunk has separated from the root ball.
Do not try to rescue a badly rotten root system by planting it deeper or adding extra fertilizer. Damaged roots need healthy tissue and suitable soil, not more stress.
How to Correct Circling Roots Before Planting
Moisten a dry root ball before working on it. Slightly damp roots bend more easily and resist breakage. However, avoid soaking a rotten or collapsing root ball, since excess handling can make the damage worse.
Use clean hands for gentle roots, and keep a clean, sharp knife or hand pruner nearby for roots that need cutting. Work over a tarp or planting bed so you can see what you're removing.
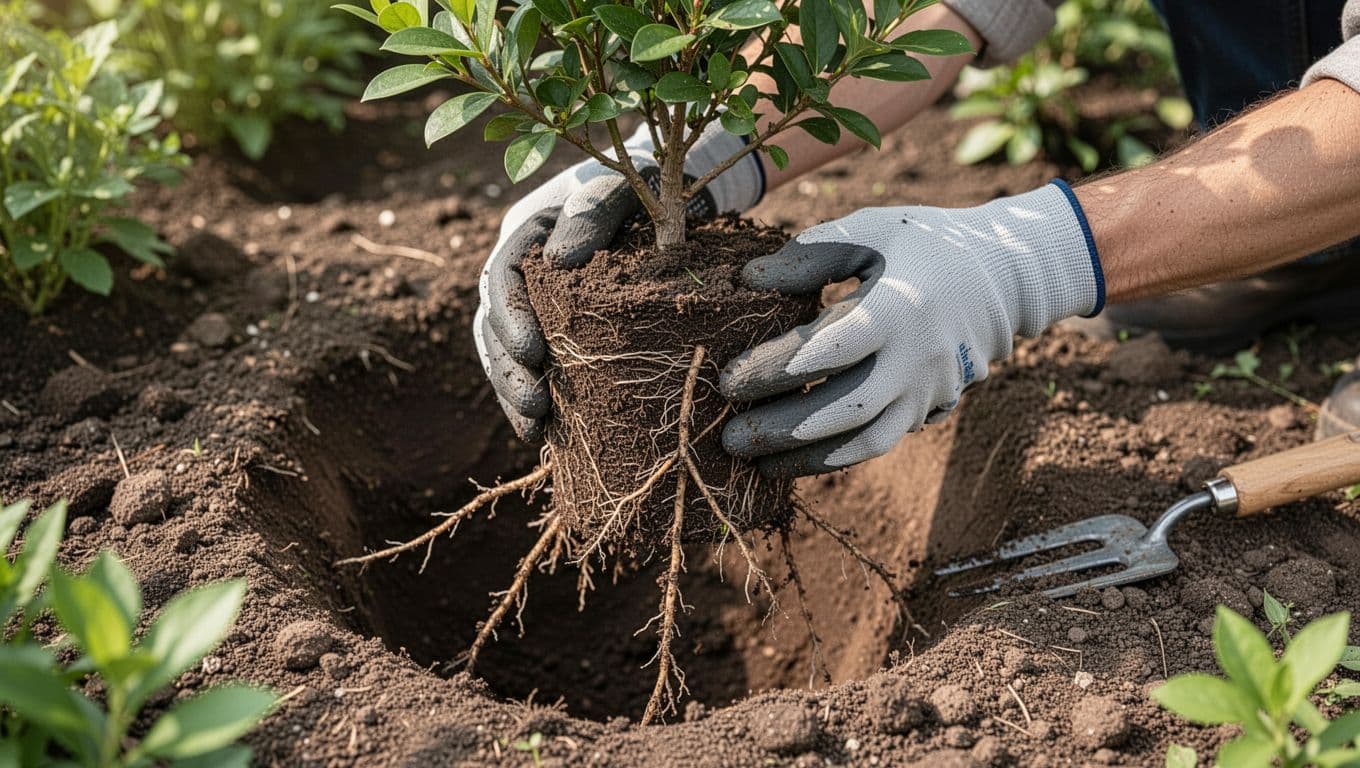
Loosen flexible roots by hand
Begin at the outer surface. Use your fingers to separate roots that run around the container wall. Tease them outward instead of tearing them away from the root ball.
If the roots form a light mat, make several shallow openings with your fingers around the sides and bottom. Spread the loosened roots so they point into the planting hole. The goal is to change their direction, not strip away every root.
For a woody shrub, inspect roots near the trunk before you place it in the hole. Remove a small crossing root only if you can clearly identify it and cut it without damaging the trunk or root flare.
Cut a dense root mat carefully
A dense, woody outer mat may need several shallow vertical cuts. Use a clean, sharp knife and make controlled cuts around the outside of the root ball. You can also cut across the bottom pad if roots have formed a solid layer there.
Keep the cuts limited to the compacted outer section. Avoid chopping deeply into the central root ball, where you may damage roots the plant needs immediately after planting.
After cutting, pull a few roots outward with your fingers. If the mass remains solid and the roots inside look healthy, continue with planting. If the root ball breaks apart or exposes widespread decay, stop and reconsider the plant.
Plant the Corrected Root Ball Properly
Root correction only works when the plant goes into a suitable hole at the correct depth. Dig the hole wider than the root ball, but don't make it unnecessarily deep. The loosened roots need room to spread sideways through the surrounding soil.
Set the plant at the right depth
Place the root ball so its top sits level with or slightly above the surrounding soil. For trees and palms, find the root flare before backfilling. The flare should remain visible rather than buried beneath several inches of soil.
Turn the plant so its strongest side faces the area where you want it seen. Then fill around the roots with the soil removed from the hole, breaking up large clumps as you go. Don't pack the soil hard with your feet, because compacted soil limits air and water movement.
Water slowly after planting to settle the soil around the roots. Add more soil if the plant settles too low, but don't cover the trunk or stem.
Protect the roots during establishment
Apply a thin layer of mulch over the root zone, keeping it several inches away from the trunk or main stems. Thick mulch piled against the plant can hold too much moisture against the bark and encourage decay.
Water according to the plant's needs, the soil type, rainfall, and current weather. Newly planted roots need consistent moisture while they spread, but constantly saturated soil can cause root problems. In Southwest Florida, heavy summer rain may provide enough water for a period, while sandy areas can dry quickly during hot weather.
If you need a more controlled watering plan, review these water-efficient drip irrigation options before placing tubing or sprinkler heads.
Inspect Plants Before a Larger Yard Project
Root inspection is easiest before hardscape work, irrigation changes, or bed installation begins. If a concrete company is preparing a walkway or patio near new planting areas, keep heavy equipment away from loose planting soil whenever possible. Compaction can make it harder for corrected roots to spread.
The same planning applies when you combine shrubs with pavers, mulch, natural sod, or artifical turf. Leave enough soil volume for mature roots and enough access for future maintenance. For example, schedule paver cleaning before planting a narrow bed beside the walkway if runoff or equipment could disturb new roots.
A larger project also benefits from a clear installation order. Planting beds should have suitable soil, drainage, and irrigation before the plants arrive. You can review custom planting and hardscaping services when your project includes both living plants and permanent outdoor features.
For seasonal timing in the area, this guide to when to plant shrubs and palms in Cape Coral can help you plan the installation around local conditions.
Conclusion
A quick root inspection can reveal problems that leaves and branches hide. Support the root ball, never pull by the stem, and correct flexible circling roots before planting. When roots are girdled, rotten, badly dried, or widely broken, replacing the plant is usually safer than forcing a damaged specimen to recover.
The strongest choice is a healthy plant with roots that can spread into its new soil. Give those roots the right depth, room, moisture, and protection, and your new planting will have a better start.