Outdoor Kitchen Dimensions for Florida Patios
Most Florida homes need outdoor kitchen dimensions of at least 8 by 10 feet for a practical grill-and-counter setup. A larger kitchen with a sink, refrigerator, bar seating, and comfortable traffic flow usually needs 12 by 16 feet or more.
The right footprint depends less on the grill alone and more on what happens around it. You need room to cook, open appliance doors, pull out stools, and move safely when guests gather.
Start with the appliances you want, then add circulation space before choosing a patio size.
How Much Space Does an Outdoor Kitchen Need?
A compact built-in outdoor kitchen can fit on a patio about 8 feet by 10 feet (2.4 by 3 meters). That size works best for a straight counter with a grill, limited storage, and no full bar.
For most Southwest Florida homes, a more comfortable target is 12 feet by 14 feet to 12 feet by 16 feet (3.7 by 4.3 to 4.9 meters). That leaves room for a grill, sink, refrigerator, prep counter, and a clear walkway.
Compact kitchens need 80 to 120 square feet
An 8-by-10-foot patio provides 80 square feet . It can support a 6-to-8-foot cooking run that is about 24 inches deep, with roughly 42 inches of open space in front.
This layout suits a homeowner who grills often but doesn't need a gathering area around the counter. Use wall-adjacent storage, a small under-counter refrigerator, and one uninterrupted prep area.
A narrow patio can still work, although it shouldn't feel like a hallway. If a grill lid or refrigerator door blocks the only path, the kitchen is undersized.
Mid-size kitchens need 168 to 192 square feet
A 12-by-14-foot patio offers 168 square feet , while a 12-by-16-foot patio provides 192 square feet . These sizes are the sweet spot for many Florida backyards.
You can fit an L-shaped counter, or a longer straight island with a seating overhang. There is also enough space to keep guests from standing directly behind the cook.
Entertaining kitchens often need 250 square feet or more
A kitchen built for family dinners, game days, or frequent visitors often needs 14 by 18 feet (4.3 by 5.5 meters) or larger. That allows for a 10-to-12-foot island, several stools, and room to walk behind them.
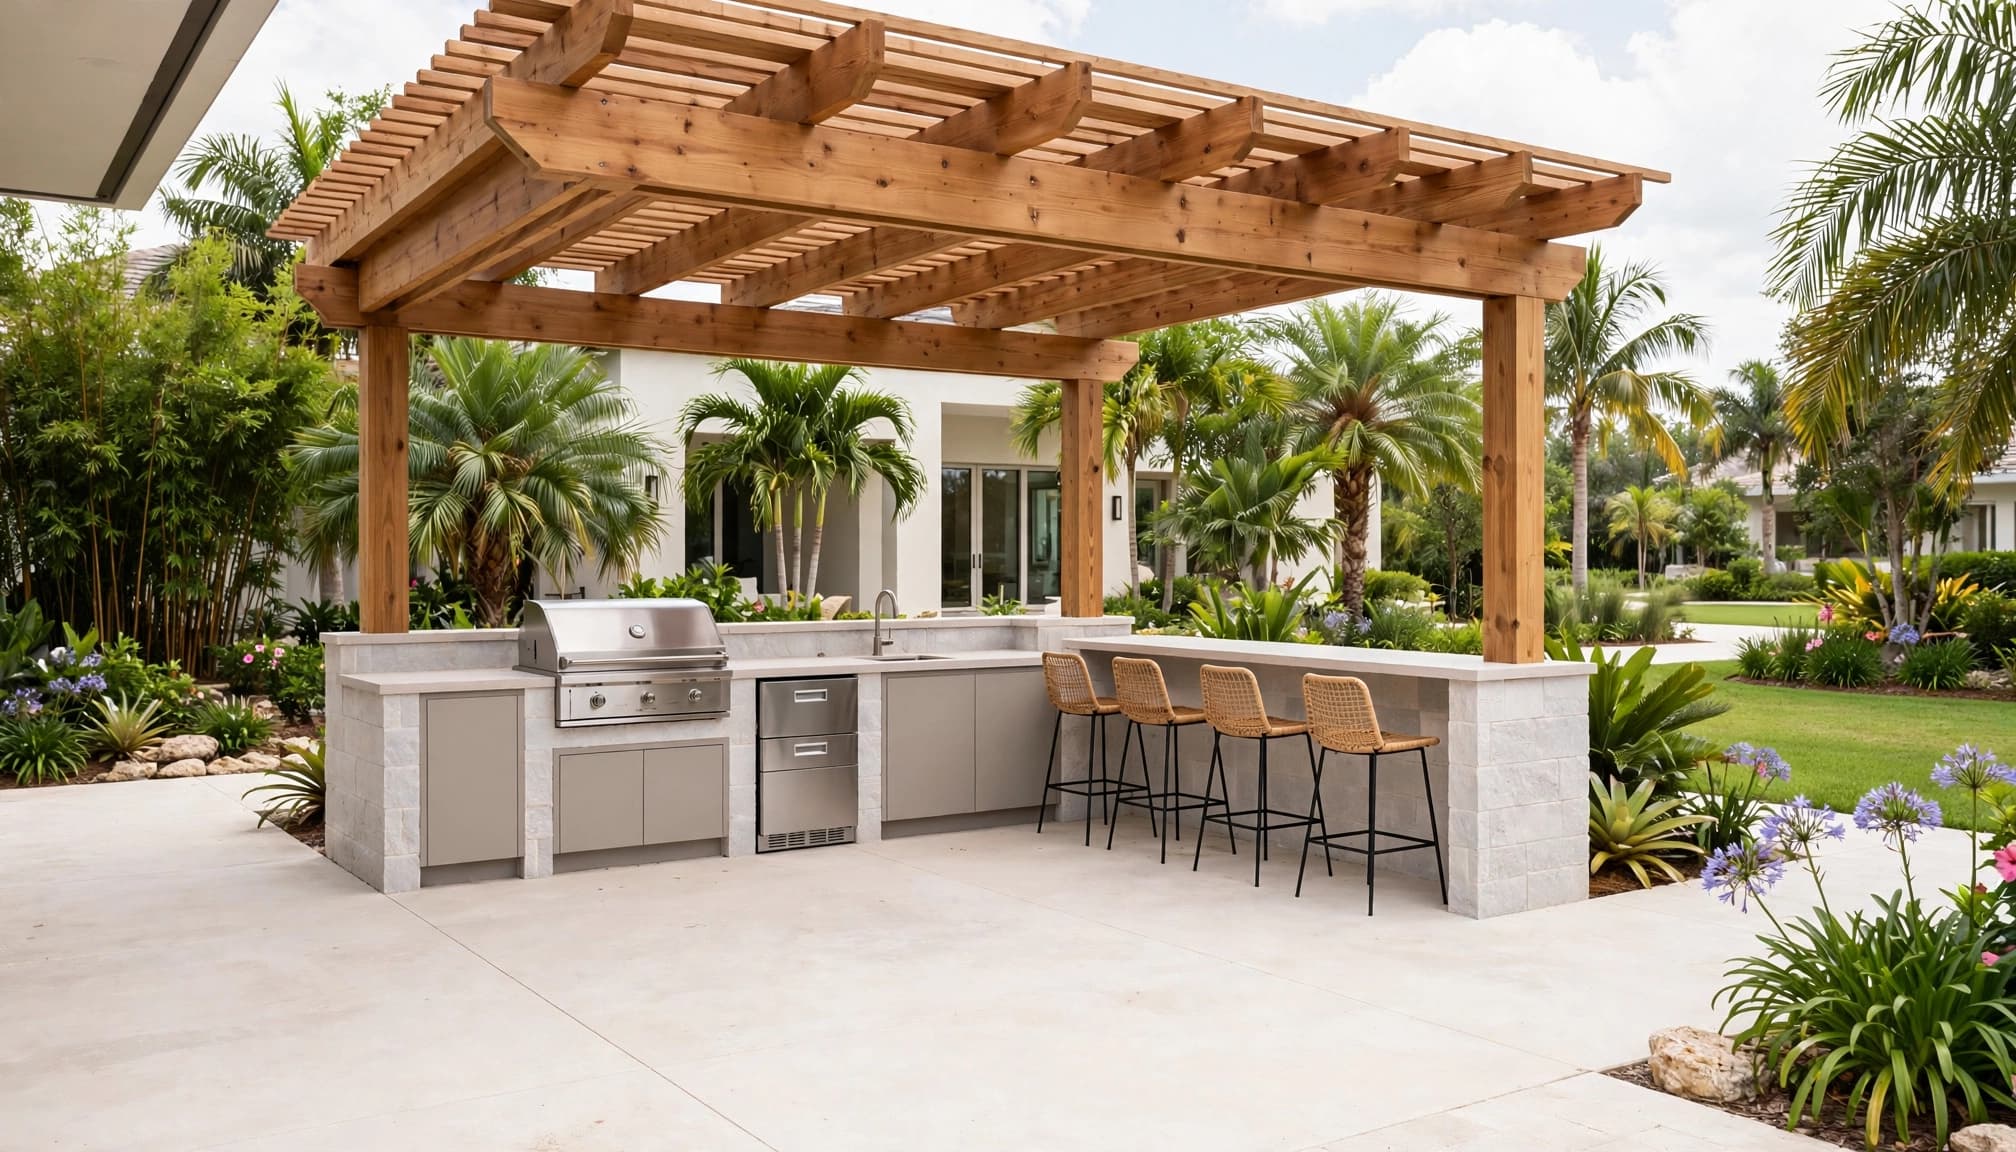
A kitchen island may only be 3 to 4 feet deep, yet seating and circulation can double the total patio depth it requires.
Calculate Outdoor Kitchen Dimensions by Component
Outdoor kitchen dimensions start with the appliance lineup. Standard base cabinets and built-in counters are typically 24 inches deep (61 cm), plus a small countertop overhang.
A standard work counter is usually 36 inches high (91 cm). A raised bar commonly reaches 42 inches high (107 cm), which creates a comfortable stool height and separates dining from food prep.
Allow enough length for the grill, sink, and refrigerator
A typical built-in grill occupies a 32-to-36-inch-wide opening. It also needs landing space on both sides, usually at least 12 inches. A 24-inch prep section on one side feels much better when handling platters and utensils.
Plan a sink with at least 12 inches of counter on one side and 18 inches on the other. Most built-in outdoor refrigerators need a 24-inch-wide opening, plus ventilation space required by the manufacturer.
Use these common planning dimensions when sketching your run:
| Component | Typical space to plan |
|---|---|
| Built-in grill opening | 32 to 36 inches wide |
| Grill landing space | 12 inches each side, 24 inches preferred on one side |
| Outdoor refrigerator opening | About 24 inches wide |
| Sink base | 24 to 30 inches wide |
| Standard cabinet depth | 24 inches deep |
| Prep counter section | 24 to 36 inches wide |
| Two bar stools | 4 to 4 feet 8 inches of frontage |
| Three bar stools | 6 to 7 feet of frontage |
A grill, sink, refrigerator, and workable prep surface usually need an 8-to-12-foot linear counter run . Storage drawers add convenience, but they also lengthen the island quickly.
Add the space people actually use
The counter is only half the footprint. Leave 42 inches (107 cm) in front of the cooking run for one cook. A 48-inch aisle (122 cm) is more comfortable when two people prepare food or pass behind each other.
A basic walkway can be 36 inches wide. However, plan 44 to 48 inches behind bar stools or busy paths. Guests tend to linger near food, and a tight aisle turns a beautiful patio into a bottleneck.
For bar seating, allow 24 inches per stool at minimum. Give each guest 26 to 28 inches if the counter is a regular dining spot. A 12-to-15-inch overhang provides reasonable knee room beneath a 42-inch bar.
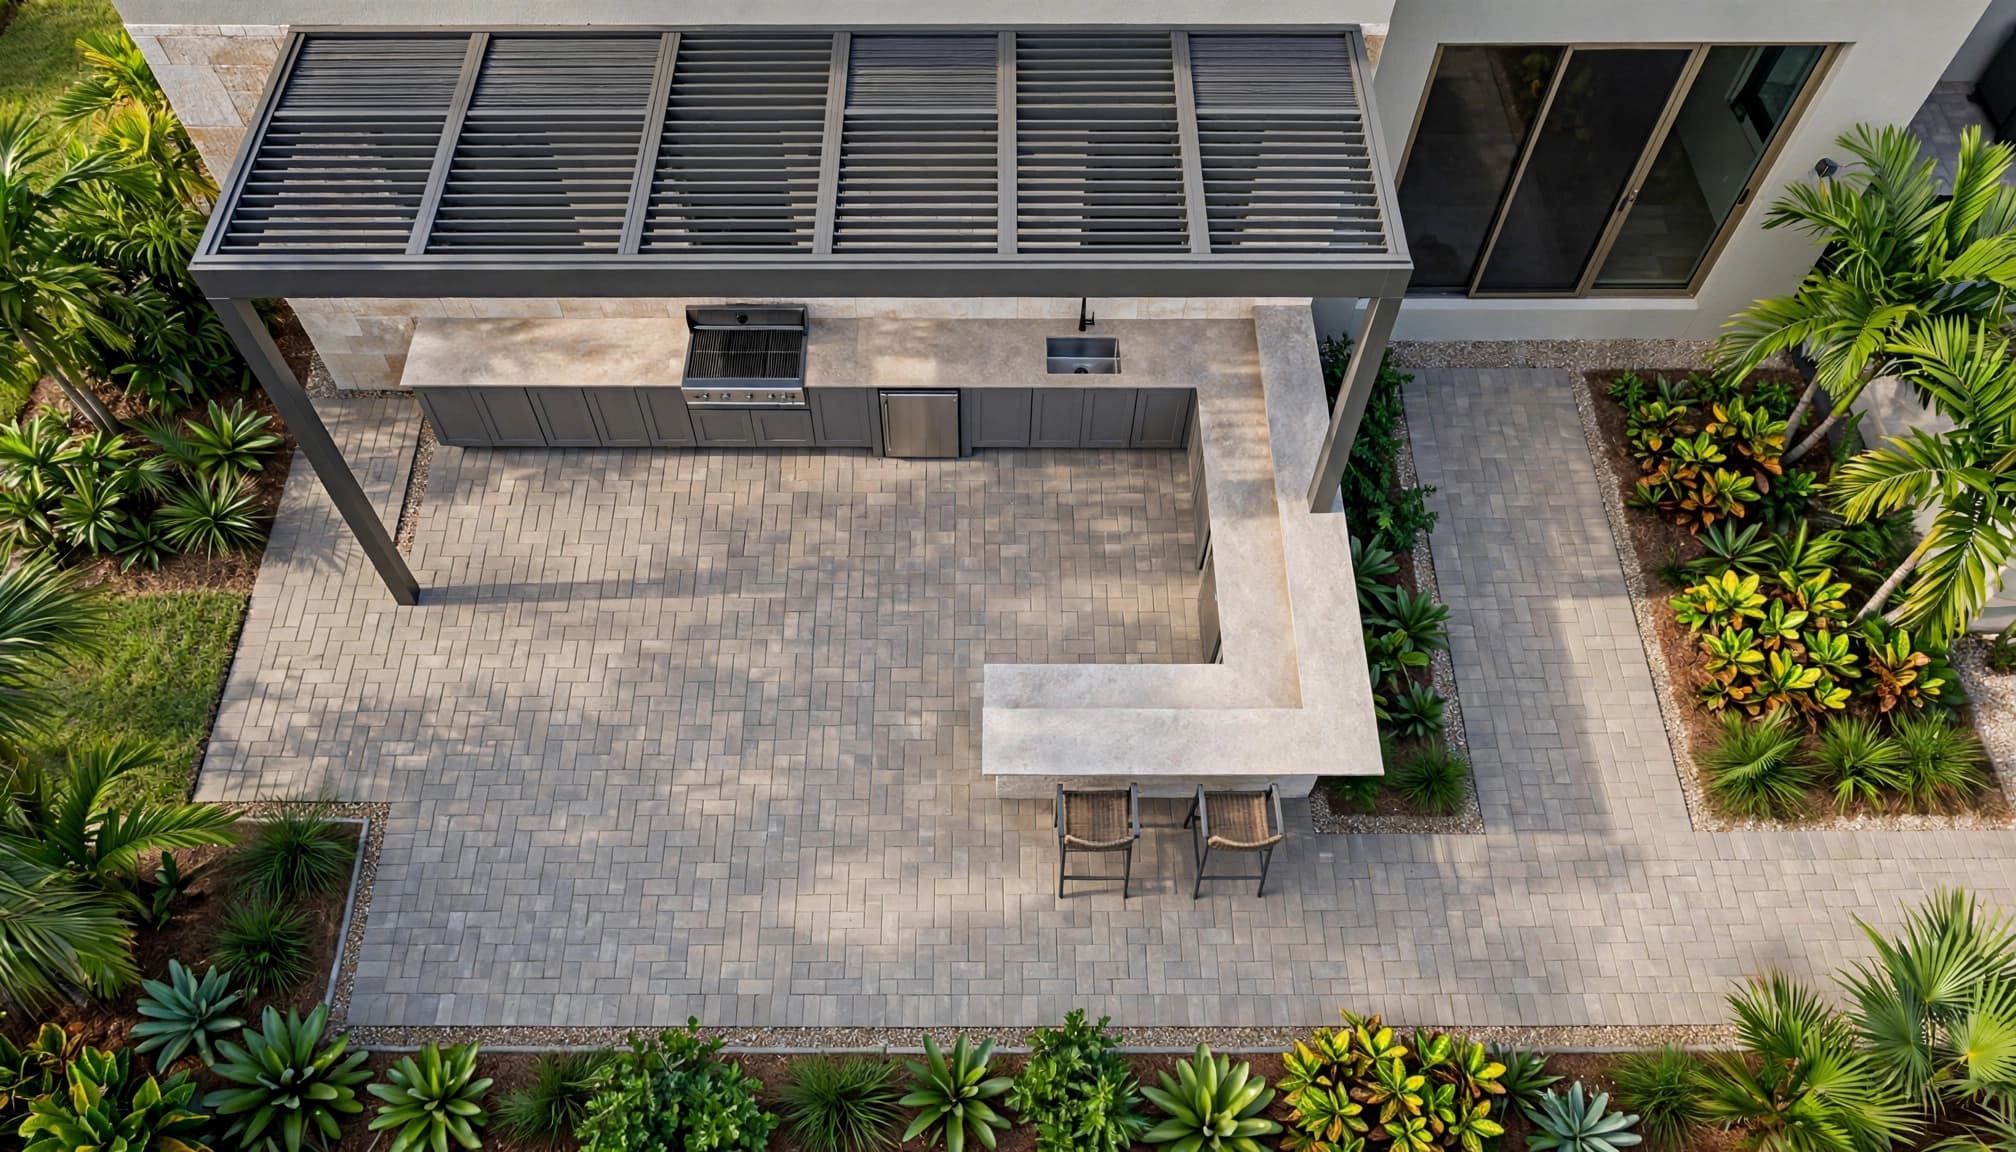
A Simple 12-by-16-Foot Florida Kitchen Layout
A 12-by-16-foot patio creates room for a useful L-shaped layout without swallowing the whole yard. Place the main 10-foot counter along one edge, then return the shorter leg 6 feet to form the L.
The longer section can hold a 36-inch grill, a 24-inch refrigerator, and counter space between appliances. Put the sink on the shorter return, where it has landing space and doesn't crowd the grill.
Keep the cooking aisle open
Set the L-shaped counters at 24 inches deep. In front of them, reserve a 48-inch work aisle. This leaves space to open cabinet doors and step aside when someone carries food from the house.
If the kitchen sits under a covered lanai, check grill manufacturer clearances before finalizing its location. A roof, hood, screen enclosure, or nearby wall doesn't replace the appliance maker's installation instructions.
Place seating outside the work zone
Add a 6-foot peninsula with three stools along the outer edge. With a 12-inch seating overhang and 48 inches behind the stools, the total depth stays workable within a 16-foot patio.
A simple layout might look like this in practice:
- Run a 10-foot counter along the patio's back edge for the grill, refrigerator, and prep area.
- Turn a 6-foot sink-and-storage section at one end.
- Keep a 4-foot aisle in front of both counters.
- Add a 6-foot bar on the outside of the short leg, with three stools and a 4-foot path behind them.
This configuration gives the cook a defined zone while keeping conversations close.
Plan for Florida Heat, Rain, Salt Air, and Storms
Florida weather should shape the placement and materials as much as the layout. Direct afternoon sun makes stainless steel surfaces hot, while repeated rain can expose weak cabinet seams and poor drainage.
A roof extension, pergola, or shade structure can improve comfort. Still, leave enough open area for heat and smoke to escape according to the grill manufacturer's guidance.
Choose materials that handle moisture and heat
Marine-grade stainless steel, weather-rated cabinetry, stone, porcelain tile, concrete, and quality pavers hold up better than untreated wood products. Near Fort Myers, Cape Coral, Estero, and Bonita Springs, salt air can speed corrosion on hinges, fasteners, refrigerator trim, and lower-grade metal frames.
A reliable concrete company can help determine whether an existing slab is suitable for the weight of masonry, appliances, and countertops. New outdoor kitchens often require utility trenches, and those are easier to plan before the final surface goes down.
Pavers work well around kitchens because individual units can be repaired if settling occurs. However, the base must stay firm and drain properly. Regular paver cleaning also helps remove grease, pollen, and mildew before they stain the surface.
Build with heavy rain and hurricanes in mind
Keep appliances away from roof runoff and low spots where water collects. Good grading directs rain away from the house and kitchen base, while a properly placed drain can help manage concentrated runoff.
Before a hurricane, shut off gas at the dedicated valve if your system and local guidance call for it. Secure loose accessories, cover appliances as recommended by their manufacturers, and latch cabinet doors and drawers.
Avoid relying on lightweight decor near the cooking area. Heavy, secured furniture and weather-resistant finishes are easier to manage before severe weather.
Measure Your Patio or Yard Before Designing
Measure the usable hardscape, not the entire backyard. Pool decks, screen doors, sliding doors, irrigation heads, tree roots, utility equipment, and property edges can all limit placement.
A careful plan also preserves room for dining, lounging, or a fire feature. The kitchen should support the way you use the yard instead of taking over every open foot.
Use this short measuring checklist before requesting a design or estimate:
- Measure the patio length and depth at several points, then record the narrowest usable dimensions.
- Mark doors, windows, pool edges, steps, screen enclosure posts, drains, hose bibs, and electrical equipment.
- Note the direction of afternoon sun, prevailing rain exposure, and any area that stays wet after a storm.
- Photograph the path from driveway to patio, because countertop sections and appliances need access during installation.
- Identify underground irrigation lines and visible utility routes before excavation.
- Reserve room for planting beds, low-voltage lighting, and landscaping that softens the kitchen's hard surfaces.
- Consider artificial turf beside a patio when you want a clean, low-maintenance transition without bringing grass clippings near the grill.
A scaled sketch on graph paper is enough for an early conversation. Mark one square as 1 foot, then draw counters at 2 feet deep and aisles at their planned width.
Match the Kitchen to the Patio Foundation and Utilities
A beautiful grill island won't perform well on a cracked, shifting, or poorly drained patio. Assess the base before ordering appliances or countertop slabs.
For pavers, look for low areas, loose edges, and wobbling furniture. For concrete, check for major cracks, drainage problems, and changes in elevation that could complicate the kitchen footprint.
Planning the right backyard renovation sequence can prevent a new kitchen from being installed before drainage, irrigation, or hardscape repairs are handled.
Confirm local rules before construction starts
Exact requirements differ by municipality, county, neighborhood association, and project scope. Confirm permits, setbacks, gas connections, electrical work, plumbing, drainage, and structural attachment details with your municipality and qualified professionals before building.
Utility distance also affects cost and design. A kitchen close to existing water, power, gas, and drainage connections is usually simpler than an island across the yard. For a fuller budget picture, review Cape Coral outdoor kitchen installation costs before choosing appliances and finishes.
Make Room for Comfort, Not Just Appliances
The best outdoor kitchen dimensions leave room to live around the kitchen. An 8-by-10-foot setup can work for simple grilling, while a 12-by-16-foot patio gives most homes a comfortable mix of cooking, storage, seating, and circulation.
Start with the appliances you will use, add clear aisles and stool space, then account for Florida rain, heat, and storm exposure. A well-sized patio feels open even when the kitchen is busy.