First 90 Days After Landscape Installation in Southwest Florida
The first 90 days after a landscape installation are a period of observation and careful adjustment. In Southwest Florida, heat, wind, sandy soil, and sudden rain can change how quickly new plants dry out or become oversaturated. Good landscape installation care starts with the installer's plant-specific instructions, then adapts to what you see in your yard.
A reliable irrigation timer helps, but it can't tell you whether water is reaching every root zone. Check soil moisture, observe the sprinkler coverage, follow local watering rules, and contact your installer promptly if plants show signs of stress. For a broader look at the early establishment period, see caring for a newly installed landscape during the first 90 days.
Key takeaways for the first three months
- Use the written care plan for each plant, sod area, and irrigation zone.
- Feel the soil near new plants before changing watering, since rain can wet mulch without soaking the root zone.
- Run each irrigation zone and look for dry spots, leaks, overspray, or pooling.
- After heavy rain, watch where water flows and whether it lingers near beds, buildings, or paved areas.
- Report new or worsening plant stress to the installer promptly.
Start landscape installation care with the handoff
The care period begins as soon as the installation is complete. Before the crew leaves, make sure you know which plants were installed, how the irrigation zones are arranged, and what care instructions apply to each area. Keep the written plan where you can refer to it, along with any notes about controller settings or maintenance responsibilities.
Get clear plant and irrigation instructions
Different plants and planting areas may need different care. A sunny bed beside a driveway can dry faster than a shaded area, while sod and shrubs may be connected to separate irrigation zones. Ask which parts of the yard share a zone and how to spot a system problem.
Also clarify who to contact about a broken sprinkler head, leaking valve, or plant that begins declining. If your installation includes a plant or workmanship warranty, understand how maintenance responsibilities relate to coverage. These details can affect what happens if a plant struggles soon after installation.
Make a simple record
Take a few photos of the finished yard and note the date the installation wrapped up. Then record observations as you make routine walks: recent rain, visibly dry areas, standing water, or irrigation adjustments made with the installer's guidance.
A short record helps distinguish a one-time reaction to hot weather from a recurring problem. It also gives the installer useful context if you report stress. For more on how irrigation and planting details relate to project planning, see evaluating irrigation and planting costs.
Check soil moisture and irrigation coverage
Southwest Florida's sandy soil drains quickly, and heat, wind, and reflected sunlight can dry planting beds faster than expected. Yet a wet-looking surface doesn't always mean the root zone has enough moisture. Check below the mulch near the plant, taking care not to disturb its roots.
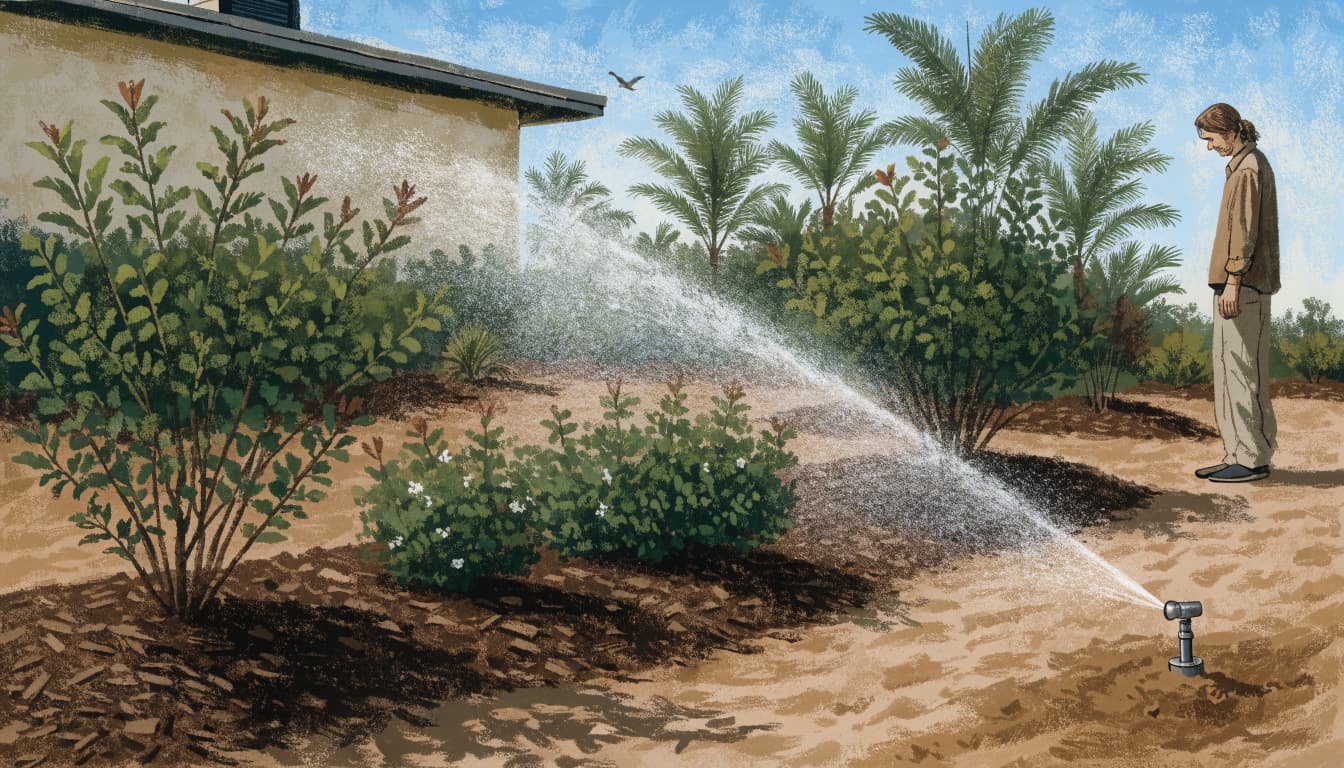
Watch a full irrigation cycle
When the system runs, walk the yard and look for whether water reaches the intended areas. Check that spray heads aren't blocked, leaking, or watering a wall, walkway, or driveway instead of the bed. Drip lines and micro-sprayers should also deliver water where the planting plan calls for it.
A working controller doesn't guarantee even coverage. Heat, wind, or a shifted sprinkler head can leave one section dry while another gets too much water. If you see a pattern like this, share it with the installer rather than making broad timer changes.
Adjust based on soil, not a fixed schedule
A single watering schedule doesn't fit every plant, soil condition, or weather pattern. Follow the care plan and local watering rules, then use soil moisture and plant condition to guide any adjustments. A rain sensor or smart controller can help limit unnecessary watering when it's set up and working properly.
After a storm, check the soil before assuming you can skip the next cycle. Rain may have soaked the mulch but left the root zone dry, or the soil may still be saturated. For a closer look at zone planning, see planning irrigation and drainage in a landscape project.
Watch how rain moves through the yard
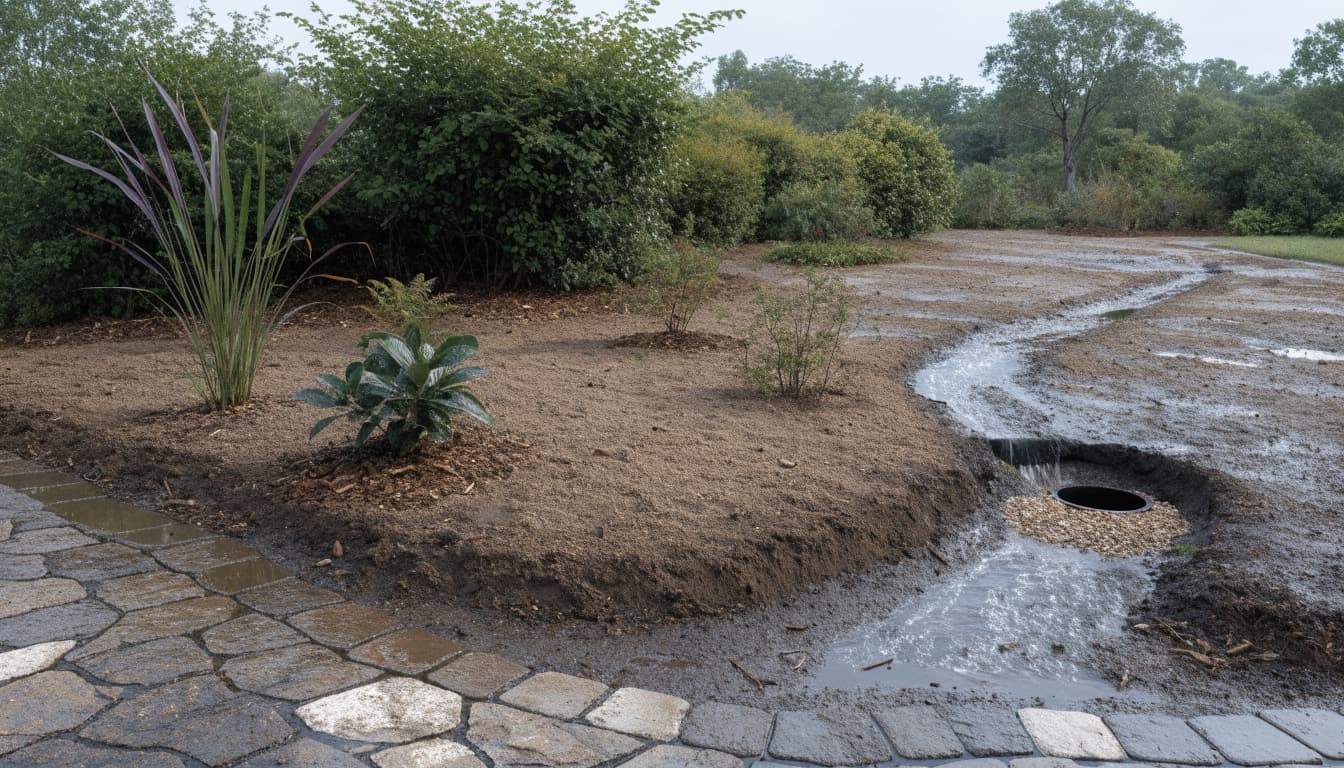
Heavy rain can reveal problems that a dry-weather walk won't show. After a strong storm, look for runoff crossing a planting bed, water collecting near the home, or soil washing away around young plants. Notice whether water moves toward a drain or paved area as intended.
Look for persistent pooling and erosion
A brief puddle after a downpour may clear as the yard drains. Repeated pooling, soil erosion, or water that remains around plants points to a condition worth reporting. Don't respond by adding more irrigation when the soil is already saturated.
Pay attention to downspouts, swales, catch basins, and French drains if they're part of your project. Clear leaves and loose debris from visible drain openings so water can enter. If the same area stays wet after rain, contact the installer promptly to discuss the drainage path.
Keep runoff off finished surfaces
Water flowing across pavers or concrete can carry soil and mulch with it, then leave debris behind. It may also show that water is escaping a bed or moving in an unexpected direction. Observe the route during rain and note where it starts and ends.
Drainage planning can involve the landscape and hard surfaces together. Our guide to French drains and drainage solutions for landscaping describes common ways to manage runoff around a property.
Follow the plant-specific care plan
New plants may show some change as they adjust to a different site, but don't assume that wilt or leaf damage is harmless. Hot weather can stress foliage, while oversaturated soil can affect roots. Since similar symptoms can have different causes, compare what you see with the installation plan and contact your installer if the condition worsens.
Water, fertilize, and prune as directed
Use the plant-specific watering guidance provided for your installation. Don't add fertilizer or prune simply because a plant looks different after planting. The right timing and approach depend on the species and its condition, so follow the care plan rather than applying a general routine.
Likewise, avoid moving plants or changing bed materials without discussing the effect on their care. A small change in shade, drainage, or irrigation coverage can alter the conditions around new roots.
Monitor for pests and other changes
During regular walks, look for damaged leaves, unusual spots, or signs of insects. Take a clear photo if you notice a change, and share it with your installer along with the date and recent weather. Avoid treating a plant before you know what may be causing the problem.
Prompt communication matters. If a plant declines quickly, an irrigation zone stops working, or you find a leak, report it rather than waiting for the next routine maintenance visit.
Protect sod, turf, pavers, and concrete
The first few months involve more than plant care. Keep soil, mulch, paint, and construction debris off finished pavers and away from drain openings. Also keep heavy equipment away from new edges unless the installer has approved the access plan.
Natural sod needs prepared soil and appropriate irrigation coverage. If a section keeps failing, consider whether drainage or shade may be part of the problem before replacing it. Artificial turf also depends on a properly prepared base, suitable edge treatment, and a route for water to drain. It shouldn't cover a recurring wet spot without addressing the underlying issue.
For pavers, sweep off leaves and loose soil before they stain or collect in joints. If you're planning paver cleaning, follow the installer's maintenance guidance to avoid damaging the surface. Watch for rocking pavers, washed-out joints, or edges that have settled near drains.
Concrete walks and patios need attention too, especially where runoff crosses the surface. If water consistently pools or flows toward a planting bed, a concrete company may be part of the conversation about correcting the slope or runoff around hard surfaces.
Track changes and contact the installer early
A quick walk through the yard can help you catch small problems before they affect a larger area. Look at the same beds and lawn sections regularly, and compare current conditions with your earlier notes and photos.
Notice patterns, not just isolated symptoms
One wilted leaf after a hot afternoon doesn't explain the whole plant's condition. Check whether the soil feels dry or saturated, whether nearby plants show the same change, and whether the irrigation zone ran as expected. A pattern across one zone may point to coverage; a problem limited to one plant may need a different response.
Meanwhile, note whether an area receives strong reflected heat from a driveway or patio. These surfaces can dry nearby soil faster, even when other parts of the yard remain moist.
Share useful details when reporting a concern
When you contact the installer, describe what changed, when you first noticed it, and whether it followed heavy rain, intense heat, or an irrigation cycle. Photos can show how quickly a problem is spreading. Avoid making several changes at once, since that can make it harder to identify the cause.
If irrigation coverage or drainage is involved, point to the affected zone or exact location. Our guide to testing irrigation after a landscape renovation covers why new planting, turf, and hardscape areas may need separate attention.
Prepare for seasonal weather
Southwest Florida's weather can shift between hot, dry conditions and heavy rain. During hurricane season, keep an eye on forecasts and secure loose outdoor items before storms. Have branches near structures addressed safely, while avoiding unnecessary pruning of newly installed plants.
Revisit the yard after storms
Once conditions allow, check plants for damaged limbs, shifted mulch, exposed roots, and leaning stakes. Look for drain openings blocked by leaves or debris, and check whether pavers or edging moved. Don't walk across saturated lawn areas with heavy equipment, which can compact wet soil or leave ruts.
Return to the care plan after weather changes
A rainy stretch may reduce the need for irrigation, while a hot, windy period can dry sandy beds quickly. Continue checking soil moisture instead of relying on a calendar alone. If the weather has damaged an irrigation component or changed how water flows through the yard, contact the installer about the repair.
Frequently asked questions
Should I water new plants every day?
There isn't one daily schedule that suits every installation. Plant type, soil moisture, irrigation coverage, recent rain, and local watering rules all matter. Follow the installer's plant-specific care plan and check the soil before changing the controller.
Is a wet mulch surface proof that the roots have enough water?
No. A quick rain shower can wet the mulch while leaving the soil near the roots comparatively dry. Check below the surface near the plant, without disturbing its roots, and use the care plan to guide your response.
What should I do if a new plant starts to wilt?
Check soil moisture and note whether other plants in the same area show similar signs. Then contact the installer promptly, especially if the condition is worsening. Avoid assuming that the plant needs more water, since saturated soil can also cause stress.
Can artificial turf fix a yard that stays wet?
Turf alone won't correct a recurring drainage problem. Its base and drainage path need to work with the site conditions. Identify where the water is coming from and discuss the drainage issue before covering the area.
Give the new landscape time and attention
The first 90 days are best managed through consistent observation, not a one-size-fits-all schedule. Follow the care plan, check soil moisture and irrigation coverage, and notice how rain moves through the property.
When plants show worsening stress or water behaves unexpectedly, contact the installer early. Good landscape installation care begins with the handoff and continues with adjustments based on what your yard actually needs.