How to Test Cape Coral Soil Before Planting Shrubs
A shrub can look healthy at the nursery and struggle within weeks after planting. Cape Coral soil testing helps you find out whether the problem is poor drainage, salt, high pH, or missing nutrients before you spend money on plants and fertilizer.
Cape Coral yards often contain sandy soil mixed with shells or limestone. Water moves through that soil quickly, yet some areas still hold water near foundations or compacted beds. Testing gives you useful facts about the planting site, while a separate irrigation water test reveals whether your water is adding salts or affecting soil chemistry.
Why Cape Coral Soil Testing Matters Before Planting
Shrubs need more than sunlight and regular watering. Their roots need a suitable pH, access to nutrients, and enough oxygen in the soil. In Cape Coral, those conditions can vary across one property.
Sandy soil commonly drains fast and may lose nitrogen and other nutrients through leaching. Shell fragments and limestone can also push soil toward an alkaline pH. High pH can make iron, manganese, and other nutrients harder for shrubs to absorb, even when those nutrients exist in the soil.
Salt creates another concern, especially near canals, seawalls, heavily irrigated areas, or locations exposed to salt spray. Salt buildup can damage roots and cause leaf browning, yellow edges, slow growth, or sudden decline. Adding fertilizer to a salty planting bed can increase the stress.
A soil test can measure pH, nutrient levels, and often soluble salts or electrical conductivity. Ask the laboratory which tests it includes before sending a sample. Basic garden test kits may provide a rough pH reading, but they usually don't provide enough information for reliable shrub planning.
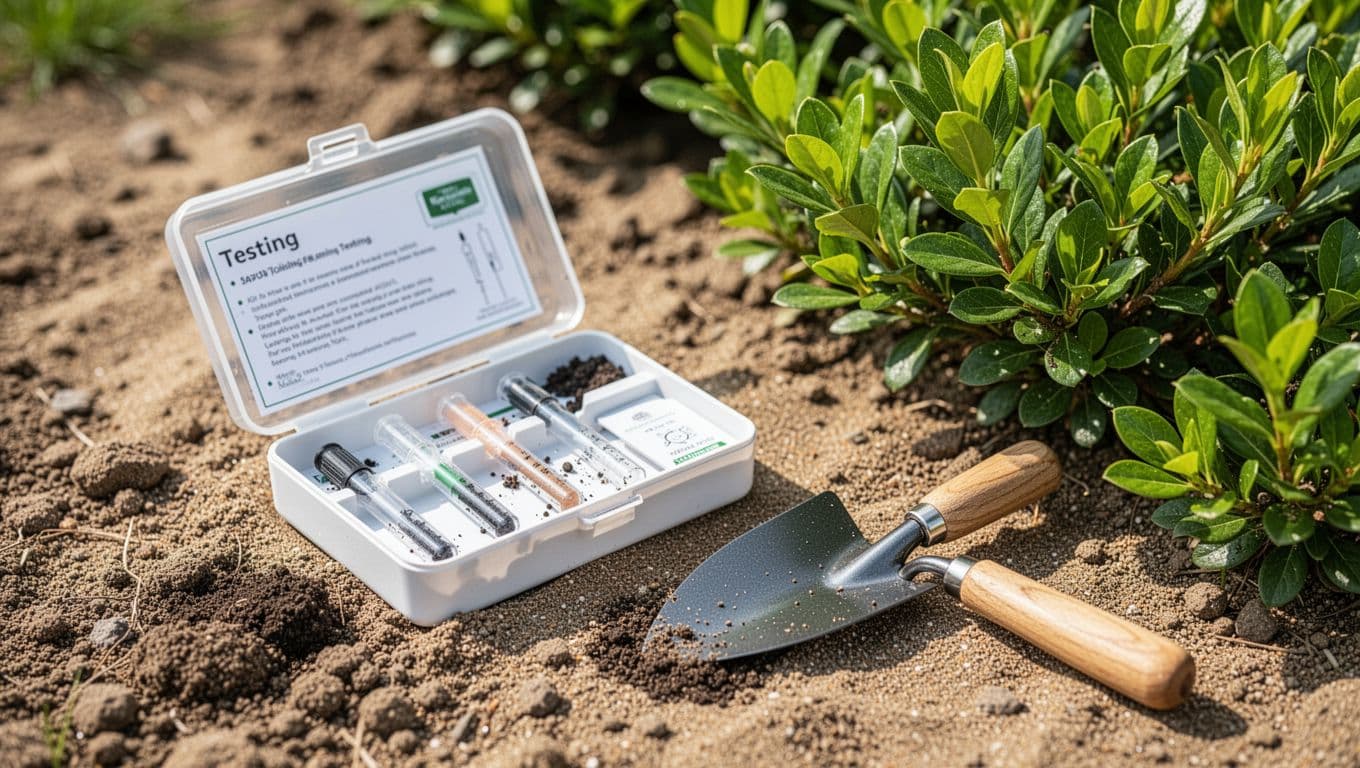
A soil test tells you what is present in the soil. It doesn't tell you how quickly water drains or whether irrigation water is adding salt.
Test the soil before adding compost, lime, sulfur, fertilizer, or other amendments . Any of those products can change the sample and produce results that no longer reflect the original planting bed.
Homeowners planning broader Florida-Friendly landscape design ideas should test planting areas as part of the site review, not as an afterthought.
How to Collect a Useful Soil Sample
Good results depend on collecting a representative sample. A sample from one unusual spot won't describe the entire bed.
First, divide the property into separate areas with similar conditions. Keep front and backyard beds separate if they receive different irrigation. Also separate areas with different soil colors, drainage patterns, previous fertilizer use, or plant history. A bed beside a driveway may have different salt and pH conditions than a bed near the center of the yard.
Use a clean stainless steel or plastic trowel and a clean bucket. Avoid galvanized metal, brass, or containers that previously held fertilizer, chemicals, concrete products, or cleaning agents. Those materials can contaminate the sample.
For ornamental shrubs, collect soil from the future root zone. Take several thin slices or cores from roughly 4 to 8 inches deep, depending on the planned planting bed and existing soil depth. Don't scrape only the surface. Remove mulch, leaves, grass, and loose debris before taking each portion.
Collect five to ten small portions across one planting area. Mix them thoroughly in the clean bucket, then place the mixed soil in the laboratory's recommended container. Most labs need only a small amount, but follow the instructions provided with the soil test form.
Label each sample with its location, such as "front entry bed" or "east side hedge." Record whether the area has received fertilizer, compost, mulch, or fill soil. That background helps you interpret the results later.
Don't sample immediately after heavy rain, irrigation, or fertilizer application. Wait until the soil has returned to normal moisture and any recently applied products no longer affect the sample. If you plan to test several beds, use a separate clean tool or rinse it between areas.
Read the Report for Shrub Planting Decisions
A soil report may look technical, but several results matter most for ornamental shrubs.
Start with pH
Soil pH measures acidity and alkalinity on a scale. Many shrubs grow well in a mildly acidic to near-neutral range, but the best range depends on the plant. Florida-friendly shrubs may tolerate local conditions, while other plants can develop nutrient problems in alkaline soil.
A high pH doesn't automatically mean you should add sulfur. The correct amendment depends on the soil's buffering capacity, which indicates how difficult the pH will be to change. In sandy soil, a small amount of amendment may have a quicker effect, but it may also move through the root zone faster.
Match the plant to the site whenever possible. Choosing shrubs that tolerate alkaline or coastal conditions is often more practical than trying to force the soil into an unsuitable range.
Check nutrients before fertilizing
Look at nitrogen, phosphorus, potassium, magnesium, and any micronutrients listed by the lab. Nitrogen deficiency can cause pale foliage and weak growth. Iron or manganese availability problems can cause yellow leaves with greener veins, especially when pH is high.
Avoid treating every yellow shrub with fertilizer. Yellowing can also result from root damage, poor drainage, compacted soil, salt injury, insects, or disease. Soil test results help separate a nutrient shortage from a watering or root-zone problem.
Phosphorus deserves care in Southwest Florida. If the report shows adequate phosphorus, adding more won't improve the shrub and can increase nutrient movement into local waterways. Use the lab's recommendations and the fertilizer label rather than guessing with a high-analysis product.
Review salinity indicators
If the report includes soluble salts or electrical conductivity, pay attention to the rating and the lab's comments. A salt reading can point to irrigation issues, coastal exposure, fertilizer buildup, or poor drainage. The right response may involve changing irrigation practices or improving drainage instead of adding soil nutrients.
For additional local context, review this guide to Cape Coral soil problems, especially if your report shows low nutrients or salt concerns.
Test Irrigation Water Separately
Soil testing and water testing answer different questions. A soil sample shows the current condition of the planting bed. An irrigation water test shows what enters the root zone each time you water.
Well water, reclaimed water, and some other sources can contain elevated salts or minerals. Over time, repeated irrigation may leave salts behind, even when a fresh soil sample looks acceptable. Water quality can also affect pH and the availability of nutrients.
Collect a water sample according to the laboratory's instructions. Use the same source that will irrigate the shrubs, such as an outdoor spigot connected to the irrigation system. Don't use drinking water from another tap if the plants receive well or reclaimed water.
Ask the lab to test for pH, electrical conductivity, sodium, chloride, calcium, magnesium, and alkalinity when appropriate. A local irrigation professional or county extension office can help explain which tests fit your water source.
Water quality matters most when symptoms repeat across many beds. Brown leaf tips, leaf drop, crusty deposits on soil, or declining shrubs near emitters may point to salt or irrigation problems. Still, those symptoms can also result from overwatering, so inspect the soil and irrigation system together.
Check Drainage After Testing
A laboratory report can't tell you whether a planting hole drains within an hour or stays wet for several days. You need a simple field check for that.
Dig a hole about 12 inches deep and 8 to 12 inches wide in the proposed shrub bed. Fill it with water and allow it to drain. Fill it again and observe how quickly the water level drops. Repeat the test in more than one location if the yard contains fill, compacted zones, or noticeable low spots.
Fast drainage is common in sandy Cape Coral soil. That can cause the root zone to dry between irrigation cycles and carry nutrients below the roots. However, compacted fill, dense layers, or a high water table can create the opposite problem. Water may drain quickly through the surface but collect below it.
Look for these site clues:
- Water remains in the hole for several hours after the second fill.
- The bed sits lower than nearby paving or turf.
- Downspouts discharge toward the future shrubs.
- Soil smells sour or feels constantly wet.
- Roots from existing plants are shallow and circling near the surface.
Correct the site before planting when drainage is poor. Options may include reshaping the bed, redirecting downspouts, repairing irrigation, installing drainage, or choosing shrubs that tolerate wetter conditions. Adding a small amount of sand rarely fixes compacted soil and can create a denser layer.
Use the Results During Bed Preparation
Once you have the soil and water reports, choose plants and amendments based on the actual site. A shrub bed may need compost or quality organic matter to improve water and nutrient retention, but the amount should match the soil report and drainage conditions.
Work amendments into the planting area rather than creating a small pocket of improved soil inside each hole. A sharply different soil pocket can hold too much water around the roots or discourage them from spreading into the surrounding soil.
Follow lab recommendations for lime, sulfur, magnesium, or fertilizer. Apply products at the stated rate and keep them away from trunks, sidewalks, driveways, and storm drains. Slow-release fertilizer is often easier to manage around ornamental shrubs than repeated heavy applications, but the plant and test results still determine the right product.
Mulch can reduce evaporation and moderate soil temperature. Keep it a few inches away from each trunk to reduce moisture-related problems. Check moisture below the mulch before irrigating, because the surface may look dry while the root zone remains damp.
Bed preparation also matters when a property includes hardscape work. If a new patio or walkway is planned, coordinate shrub placement with the landscape installation process. A concrete company, irrigation crew, and planting contractor should know where utilities, drainage lines, and future roots will be located.
The same planning helps when you combine shrubs with other outdoor improvements, such as artifical turf, pavers, or a larger patio. Avoid placing planting soil where it will wash onto hard surfaces, and plan runoff before installation begins. After construction, routine paver cleaning can remove soil and fertilizer residue, but it can't correct a planting bed that drains toward the walkway.
When to Hire Help With Soil Testing
A basic soil sample is manageable for many homeowners. Professional help makes sense when the yard has several soil types, recurring shrub failures, standing water, visible salt deposits, or irrigation from a well or reclaimed source.
A landscaping contractor can sample separate beds, inspect grading, check irrigation coverage, and recommend shrubs suited to the site. Ask whether the company sends samples to a laboratory or relies only on an inexpensive home kit. Request a copy of the report and a written explanation of any recommended amendment.
For a new bed, professional preparation can also prevent conflicts with patios, pavers, drainage systems, and irrigation lines. That matters in Cape Coral, where small grading changes can affect how water moves across a compact residential lot.
Don't accept a broad recommendation to "add fertilizer" without a test. The right solution may be a different shrub, improved drainage, cleaner irrigation water, or a modest soil amendment.
Conclusion
Cape Coral soil testing gives you a reliable starting point before planting ornamental shrubs. Collect samples from matching areas, test pH, nutrients, and salinity, then check irrigation water separately. A drainage test completes the picture because laboratory results can't show how water moves through your yard.
Use the findings to select suitable shrubs and apply only the amendments the site needs. When you test first, you replace guesswork with a planting plan that gives roots a better chance to establish in Cape Coral's sandy, sometimes salty soil.