


How to Identify Take-All Root Rot in St. Augustine Grass
Take-all root rot can leave a St. Augustine lawn yellow, thin, and weak at the roots. To identify a possible problem, compare affected grass with healthy turf and inspect the roots, runners, soil moisture, and surrounding lawn.
No single symptom confirms the diagnosis. Chinch bugs, drought, and other diseases can create similar patches in Southwest Florida yards.
A closer inspection will help you decide what to do before adding water or applying a treatment.
What Take-All Root Rot Can Look Like
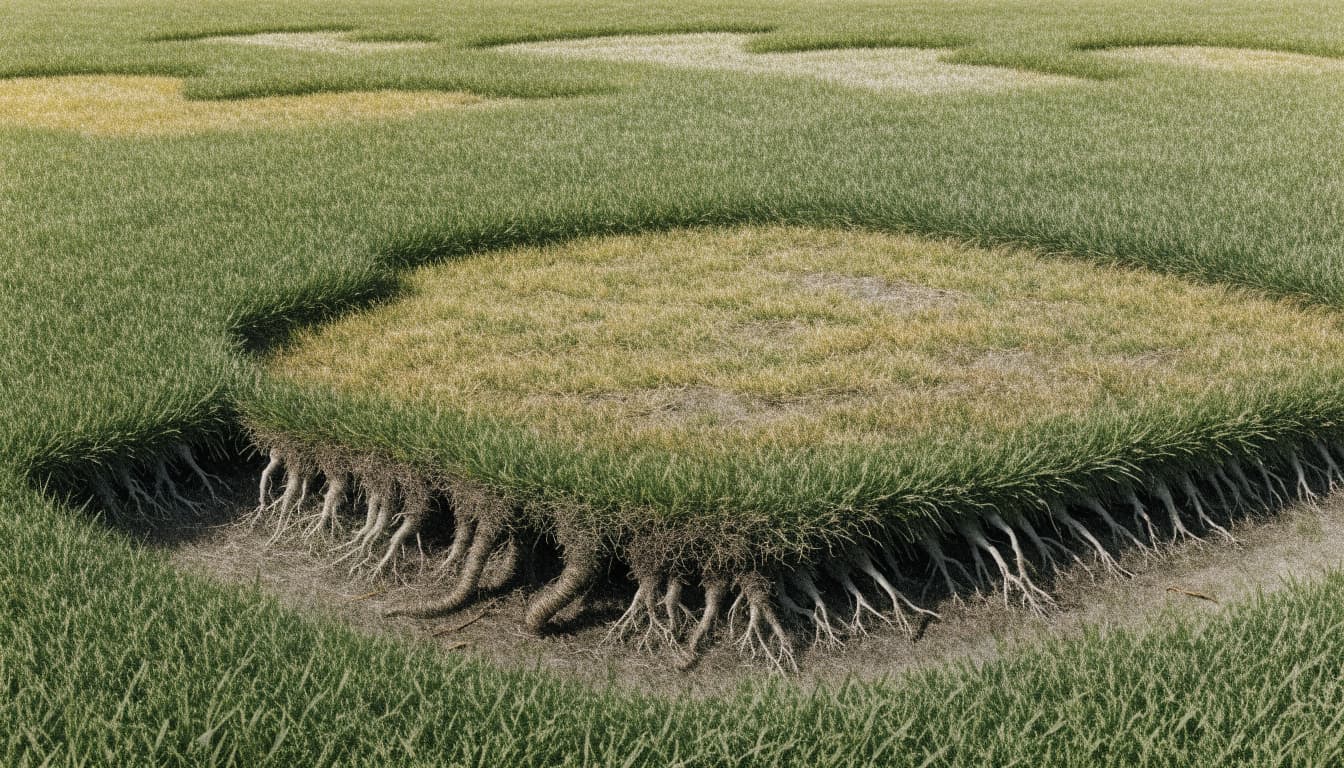
The first visible clue may be a yellow area that doesn't improve as expected. Grass can gradually thin, leaving bare soil between runners. In more damaged areas, blades may turn brown and the lawn may lose its dense cover.
Look beyond brown blades
Yellow or brown grass tells you the lawn is stressed, but color alone won't tell you why. Look for an area with a mixture of green, yellow, and thinning grass. That transition is more useful for inspection than a spot where everything has already died.
Compare the affected area with nearby healthy St. Augustine grass. Notice whether the leaves look wilted, whether the turf is sparse, and whether the change follows a sprinkler zone or a hardscape edge.
Check the parts below the surface
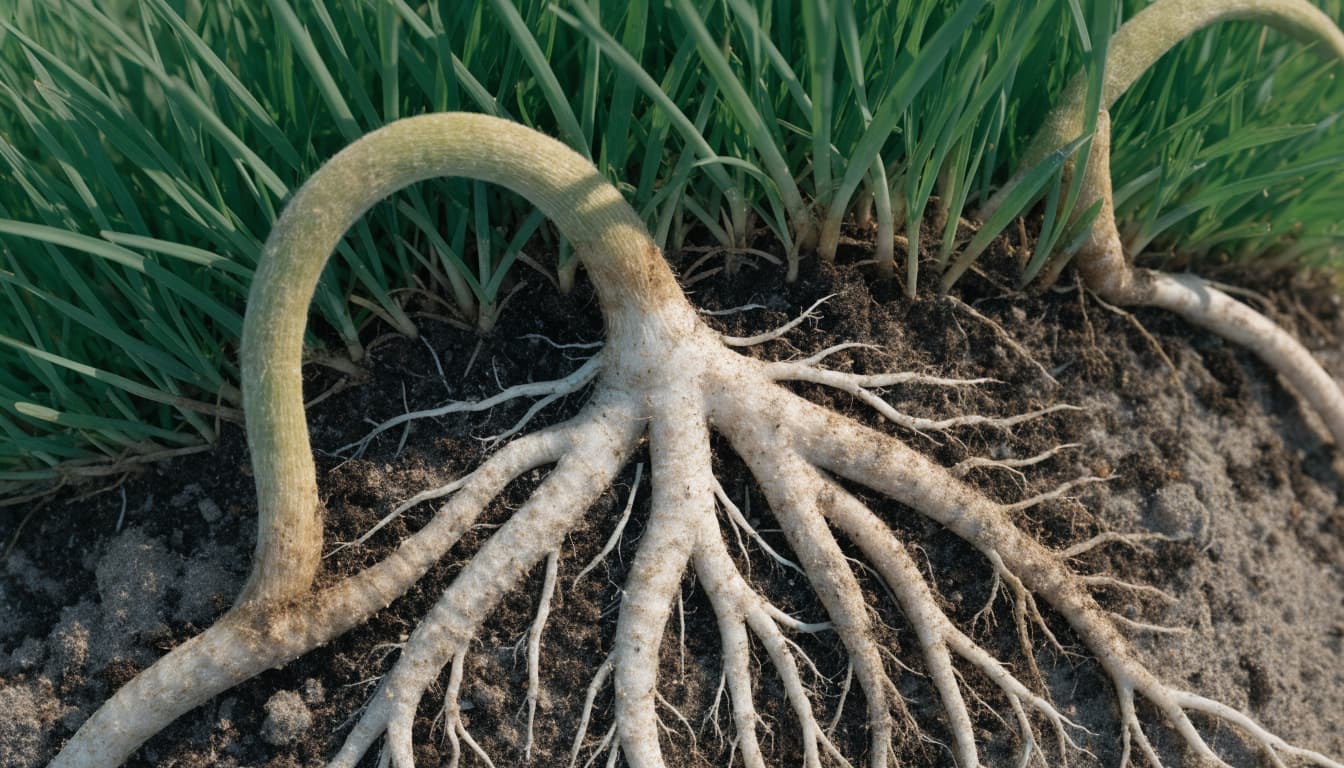
Take-all root rot is associated with weakened, darkened roots. Affected grass may also have discolored or weakened stolons, the above-ground runners that allow St. Augustine grass to spread.
Those clues make root rot worth considering, but they don't prove it. Wet soil, drought, insects, and other problems can also damage roots or leave the grass poorly anchored. The steps below help you gather a fuller picture.
Start by Mapping the Damaged Lawn
Before lifting turf, walk the yard and note where the grass changes. A phone camera, a hand trowel, and a few minutes of observation are enough to get started.
Step 1: Find the edge of the damage
Stand back and look for the boundary between healthy grass and thinning or discolored turf. Note whether the affected area has an irregular outline or follows a recognizable line, such as a driveway, sprinkler pattern, or treatment path.
Look at more than one patch if several areas have declined. A single dry corner might have a different cause than a broad area where the soil stays moist. Pay attention to shade, low spots, and areas that receive heavy foot traffic.
Step 2: Record changes over time
Take a photo that includes both the damaged area and surrounding green grass. Repeat it from the same position every few days so you can see whether the border changes.
Write down when you noticed the problem and any recent rain, irrigation changes, mowing, or lawn applications. Include nearby work such as paver cleaning or new landscaping if runoff reached the grass or equipment disturbed sprinkler heads.
These notes won't identify a disease on their own. They can, however, help a lawn professional distinguish a continuing problem from old damage.
Inspect the Roots and Stolons
A close look at the plant is the most useful part of a root inspection. Work at the edge of a declining patch, where some grass is still alive, and compare it with healthy turf nearby.
Step 3: Lift a small turf sample
Use a hand trowel to cut a small section that includes grass, roots, and some soil. Lift it gently rather than pulling up a large piece of the lawn. Take a second small sample from a healthy-looking area for comparison.
Brush away enough soil to see the roots. Healthy roots are generally lighter in color and more substantial than roots that are short, dark brown, or blackened. Look at the amount of rooting as well as the color.
Dark or sparse roots are a reason to investigate further, especially when the turf is also thinning. They aren't unique to take-all root rot, so keep the samples and observations in context.
Step 4: Examine runners and crowns
Part the grass near the soil surface. St. Augustine grass spreads through thick, above-ground runners called stolons. Check whether they appear green and firm or brown, weak, and deteriorated.
Also look at the crowns, where new leaves emerge. Firm, living plant tissue gives the lawn a better chance to fill back in than turf with dead crowns and runners. Don't assume every brown blade means the whole plant has died.
Replace the small turf sections after inspecting them and press them gently back into place. Avoid tearing out large areas before you know whether they can recover.
Compare Soil Moisture and Insect Activity
A root problem can coexist with poor irrigation or insects. Checking both gives you a better basis for deciding what the lawn needs.
Step 5: Check moisture below the surface
Push a screwdriver or narrow trowel into the soil several inches down in both damaged and healthy turf. Dry, resistant soil in the weak area can point toward insufficient water. Soil that's still moist while the grass declines calls for a closer look at roots, insects, and drainage.
Run the sprinklers briefly and watch the coverage. A blocked head, a leak, or a poorly adjusted spray pattern can leave one area dry while another receives enough water. Our guide to common irrigation repairs in Cape Coral covers several problems that can affect a zone.
Don't increase the watering schedule based on color alone. Saturated soil can also weaken grass, and extra water won't stop insect feeding.
Step 6: Look for chinch bugs
Chinch bug damage often appears in hot, sunny parts of a St. Augustine lawn, including edges beside a driveway or sidewalk. The soil may remain moist even as the grass declines.
Part the grass at the border of a damaged patch and look near the soil and thatch for small insects. Chinch bugs may be more active at the edge than in completely brown turf. If you don't see them, that observation alone doesn't rule them out.
For another comparison, see our guide to lawn fungus versus drought stress. It explains how moisture and patch location can help separate two common causes of discoloration.
Rule Out Other Common Lookalikes
Take-all root rot is one possibility among several. The location of the damage and the condition of individual blades can help you decide which clues deserve more attention.
Large patch and leaf diseases
Large patch can produce expanding yellow or tan areas, sometimes with a darker border. In some affected turf, leaf blades pull away easily near their bases. Inspect both the blades and their attachment points rather than relying on the shape of the patch.
Gray leaf spot tends to show up as small lesions on individual blades. Look closely for tan, gray, reddish, or dark marks. Leaf spots can be useful clues, although similar-looking marks don't establish a diagnosis by themselves.
Drought, chemicals, and site damage
Drought-stressed grass may look dull, folded, or blue-gray before turning brown. Footprints can remain visible after you walk across it. Check the soil and sprinkler coverage, particularly in exposed areas near concrete.
Fertilizer spills, herbicide drift, mower damage, and compacted soil can also leave discolored turf. Damage that follows a spreader path or appeared after a recent application deserves attention. Likewise, a low spot that stays wet after rain may need a drainage assessment rather than another irrigation cycle.
Know When to Get a Professional Diagnosis
Get help when patches continue to grow, roots appear badly damaged, or the observations point in several directions. An assessment is also useful before paying to treat or replace a large section of lawn.
Bring useful observations
Share photos showing the affected area over time, along with notes about watering, rainfall, recent applications, and the condition of roots and runners. Point out the transition between healthy and declining grass during the visit.
A professional can inspect the turf, soil moisture, irrigation coverage, and signs of insects together. That broader view matters because treating for the wrong problem can leave the actual cause untouched.
Consider a plant diagnostic lab
When the cause remains uncertain, a plant diagnostic lab may help assess a sample. A section taken across the boundary of healthy and declining grass is generally more useful than completely dead material.
Your local UF/IFAS Extension office can help connect you with plant diagnostic resources. Photos add context, but they can't show everything a close inspection of the grass and roots can reveal.
Care for the Lawn While You Investigate
Until you have a clearer answer, avoid trying several treatments at once. It becomes harder to tell what helped, and an unnecessary application can add stress to already weak grass.
Keep routine care gentle
Adjust irrigation to the soil's condition and recent rainfall. Mow with a sharp blade, keep the mower at the upper end of the recommended height for your St. Augustine cultivar, and remove no more than one-third of the blade at a time.
Don't apply fertilizer simply to make yellow grass greener. For established lawns, our guide to fertilizing St. Augustine grass covers timing and other factors to consider.
Decide whether the area needs replacement
Living crowns and firm runners may continue to grow once the underlying stress is addressed. Completely dead areas may need plugs or sod, but replacing grass before correcting a sprinkler or drainage problem can leave the new turf vulnerable to the same conditions.
For a spot that repeatedly struggles with shade, traffic, or difficult irrigation, compare living grass with another surface. We install sod and artificial grass, and the right choice depends on how you use the space and how well it drains.
Use the Whole Lawn to Make Your Decision
Yellow grass and dark roots can make take-all root rot a reasonable concern, but they aren't a confirmed diagnosis. The most useful inspection combines the patch pattern with soil moisture, root condition, runners, and signs of insects.
Take a few photos and examine the boundary between healthy and declining turf. If the cause remains unclear or damage keeps spreading, a professional assessment can help you choose the right next step.