How to Fix Sod Gaps Before They Spread
New sod can look finished on installation day, then develop thin seams as the pieces settle. Learning how to fix sod gaps quickly helps protect the exposed edges from drying out and keeps weeds from taking root.
Small openings may close as the grass establishes, but larger gaps need attention. The right repair depends on the gap's width, the condition of the soil underneath, and how long the sod has been down. Start by checking the seams, then repair the problem before watering and weather make it worse.
Why New Sod Pieces Develop Gaps
Sod gaps usually come from installation, drying, or movement. Fresh rolls and slabs contain living roots, so their edges can shrink slightly if they lose moisture. Hot weather, wind, and uneven watering make that shrinkage more noticeable.
The soil base can also settle after installation. If one section sits lower than its neighbor, the sod may slide, pull apart, or leave a shallow depression. Heavy foot traffic and pets can move newly installed pieces before their roots anchor into the soil.
Poorly cut edges create another common problem. Sod should meet in tight seams without overlapping. When installers stretch a piece to cover a short area, it can contract later and leave a gap. Cutting pieces too short creates the same result.
A narrow seam, especially one that is less than about half an inch wide, may close naturally as the grass grows. Keep it moist and monitor it for several days. However, a gap wider than roughly one inch exposes enough soil to invite weed seeds and dry the nearby sod edges, so fill or patch it promptly.
For Southwest Florida yards, selecting a grass type that suits the property also matters. Review these best Cape Coral sod choices before replacing a struggling section with a variety that needs different sun, water, or soil conditions.
How to Fix Sod Gaps Without Damaging New Roots
Before you begin, gather a sharp utility knife, a hand trowel, a garden hose, and a small amount of clean topsoil or screened lawn soil. For larger repairs, use a matching piece of fresh sod from the same grass variety.
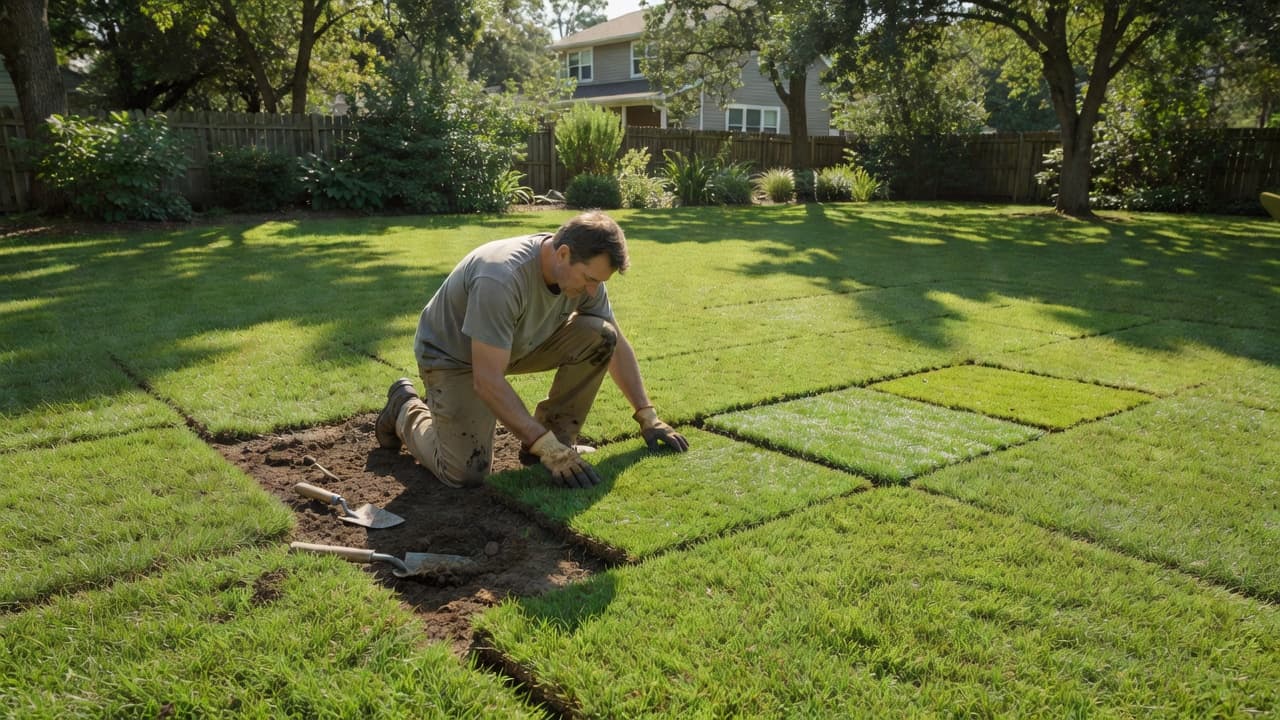
Repair narrow seams with soil and water
Use this method when the gap is narrow, the sod is still green, and the pieces remain level.
- Check the seam first. Lift the edge slightly with your fingers. Don't pull hard or tear the new roots. Look for dry soil, a low spot, or an edge that has curled upward.
- Moisten the surrounding sod. Water the area enough to soften the soil without creating standing water. Damp sod edges are less likely to crumble while you adjust them.
- Move the pieces together. Press each slab gently toward the opening with your hands or the flat side of a trowel. Never stretch the sod across the gap. Stretching creates tension that can reopen the seam.
- Add a thin layer of soil. Brush screened topsoil into the remaining opening. Use enough to reach the surface of the sod, but don't bury the grass blades or cover the entire piece.
- Press the seam flat. Pat the repair with your palm or lay a short board over it and apply light pressure. The goal is firm contact between the sod roots and the soil below.
- Water the repair again. Keep the seam damp while the sod roots establish. Check the area later that day because warm weather can dry a narrow strip faster than the rest of the lawn.
Don't use garden mulch, gravel, or a thick layer of compost to hide a seam. Those materials can block grass growth and leave an uneven surface.
Patch larger openings with matching sod
A wide opening needs more than loose soil. A patch prevents the exposed base from washing away and gives weeds less room to grow.
First, square up the damaged area with a sharp knife. Cut through the sod along straight lines, removing loose or dried edges. The opening should have firm sides so the replacement piece can fit without curling.
Next, check the soil depth. Add or remove soil until the surface sits level with the surrounding lawn. If the patch is too high, it can become a trip point. If it's too low, water may collect around it and cause the edges to separate again.
Cut a piece of matching sod slightly larger than the opening. Place it over the area, mark the cut, and trim it for a snug fit. A close fit is better than forcing an oversized patch into place.
Set the patch into the opening and press the edges together. Water the section thoroughly, then keep it consistently moist while roots connect with the soil. Limit walking on the patch during this period.
If you need to replace a large section, avoid mixing grass varieties unless you accept a visible difference in color and texture. Homeowners comparing natural sod with artifical turf should also remember that synthetic grass doesn't shrink or root into soil, but it requires a different base and installation method. For natural and synthetic options, see these sod and artificial grass installation services.
When a Sod Gap Will Close on Its Own
Not every seam needs cutting or patching. A fine line between healthy pieces can disappear as the grass sends runners across the opening. This is common when the edges are moist, level, and firmly touching the soil.
Watch the seam for three to seven days. If it stays green and slowly narrows, continue normal establishment watering. Avoid filling a tiny opening with too much soil because the added material can smother the grass along the edge.
A gap deserves immediate repair when you see brown or curled edges, visible dry soil, weeds, standing water, or movement underfoot. Also act quickly if the opening widens after each watering. That pattern points to poor soil contact, erosion, or a grading issue.
A seam can look harmless while the exposed soil underneath dries the roots along both edges. Check gaps below the grass surface, not only from a standing position.
Sod that has dried completely may not recover even after watering. Replace brown, brittle pieces instead of pushing them together and hoping they root.
Troubleshooting Sod Gaps That Keep Coming Back
Recurring gaps usually indicate a problem below the grass. Repairing the seam without correcting that cause often produces the same failure within days or weeks.
Uneven or settling soil
Lift the affected sod carefully and inspect the base. Fill low spots with compatible lawn soil, then compact it lightly. Avoid packing the soil hard, since roots need air and water to move through the base.
Inconsistent irrigation
A sprinkler may wet the center of the yard while leaving the edges dry. Place a few shallow containers around the area and run the system for a normal cycle. Compare the water collected in each container. Adjust blocked heads, broken lines, or overspray before repairing the sod again.
New sod needs consistent moisture during root establishment, but saturated soil can also cause movement. If water remains on the surface, check for compacted soil, a blocked drain, or an incorrect grade.
Poor soil contact
Air pockets under sod prevent roots from connecting with the soil. Lift loose areas, smooth the base, and press the sod down with a lawn roller or a flat board. Keep the pressure light enough to avoid squeezing out all the air and water from the soil.
Traffic and pets
Footsteps can shift fresh pieces before they anchor. Keep people, pets, carts, and lawn equipment off the area as much as possible. Place temporary barriers around the repair if the route receives regular traffic.
Edges near patios and pavers
Sod beside a patio, walkway, or driveway may separate when the hard surface sheds water toward the lawn. Soil can wash out along the edge, especially during heavy rain. A landscaping contractor can correct the grade and reset the border.
If the problem involves a settled concrete slab or a drainage slope beside a driveway, contact a qualified concrete company before replacing the grass repeatedly. Repairing the hardscape or drainage may solve the gap at its source.
Keep soil and repair debris off nearby pavers. If you schedule paver cleaning after the installation, tell the crew that the sod is still rooting so water pressure and runoff don't disturb fresh patches.
Care After You Repair the Seam
Water repaired areas immediately after filling or patching them. Then check the soil beneath the sod each day. The surface can appear damp while the root zone is dry, especially during hot, windy weather.
Keep mowing and foot traffic limited until the sod resists a gentle tug. When the grass has rooted, follow the care instructions for its variety. Mow with a sharp blade and remove only a small portion of the grass height at one time.
Don't apply extra fertilizer to force a patch to grow faster. Too much fertilizer can stress new roots and create uneven growth. Use the sod supplier's instructions or ask a local lawn professional about the correct timing for your grass type.
During the first few weeks, inspect all seams after heavy rain and irrigation cycles. Early adjustments are easier than replacing a long strip after the edges have dried, washed out, or filled with weeds.
Fix Sod Gaps Before They Become Lawn Problems
A narrow, healthy seam may close as new sod roots into the soil, but waiting too long with a wide opening invites weeds and dries the surrounding edges. Bring tight seams together gently, brush in a little screened soil, and patch larger gaps with matching sod.
Recurring separation points to a base, watering, traffic, grading, or drainage problem. Once you correct that cause, the repair has a much better chance of lasting. A smooth lawn starts with tight sod contact, steady moisture, and quick attention when the first gap appears.