


Plumeria Rust Spots: Disease or Normal Leaf Aging?
Plumeria rust can cause leaf spots and powdery growth, but a discolored leaf alone doesn't tell you whether the plant has a disease. The most useful next step is to inspect both sides of several leaves and watch how the symptoms change.
In Southwest Florida, rain, irrigation, and nearby landscape work can all affect foliage. A closer look at the plant and its surroundings can help you decide what needs attention before you reach for a spray.
What plumeria rust spots look like
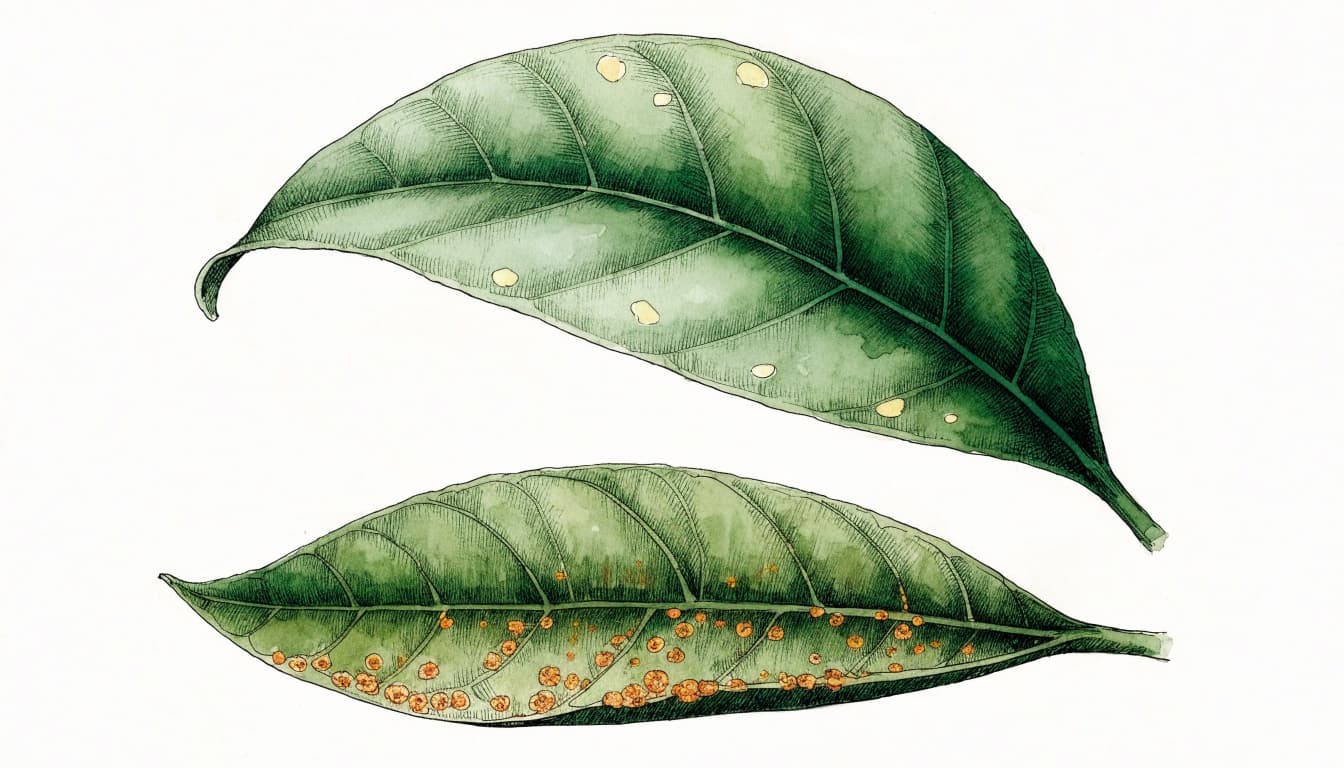
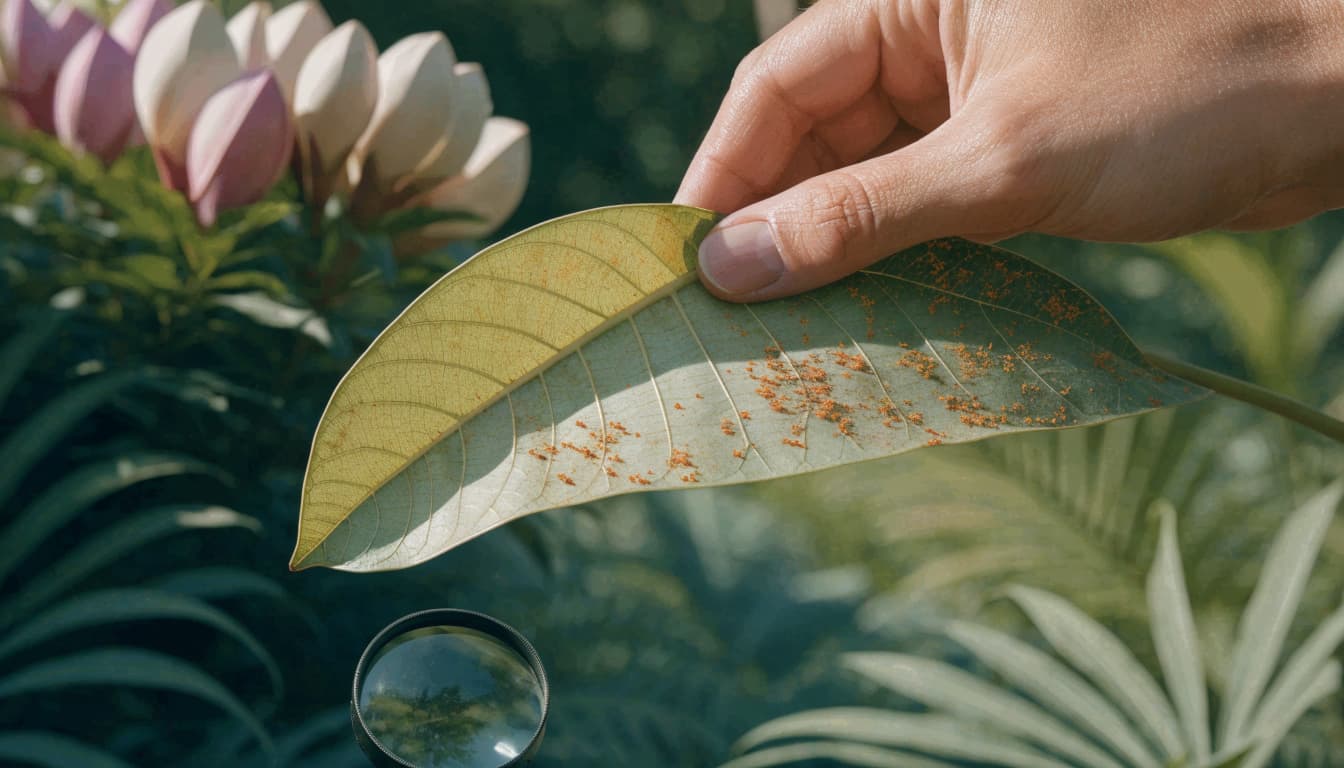
Plumeria rust is a fungal disease associated with Coleosporium plumeriae. It affects the leaves, where fungal structures can appear as small, raised, powdery pustules. The underside of the leaf deserves particular attention because that's where those structures can develop.
Look beyond the leaf color
A color change is a symptom, not a complete diagnosis. Dust, spray residue, insect activity, and physical injury can also leave marks on foliage. Look for a raised or powdery surface rather than relying on color alone.
If you see a suspicious patch, note whether it appears to be part of the leaf tissue or material sitting on the surface. A hand lens can make small structures easier to see. Powder on its own doesn't establish which fungus or other material is present.
Compare the upper and lower surfaces
Turn the leaf over gently and inspect the area beneath any visible spots. Check several leaves rather than drawing a conclusion from one mark. Fungal growth on the underside gives you more useful information to investigate than discoloration viewed from above.
Keep the distinction between what you see and what you think caused it. A photo of the underside, along with a photo of the whole plant, gives a plant diagnostician more to work with.
How to inspect a plumeria leaf
Start with the plant as a whole, then move closer. You'll get a better picture of the problem if you inspect the canopy, the leaves, and the conditions around the root zone.
Choose leaves in different parts of the canopy
Look at several leaves near the branch tips and several farther back. Inspect foliage on both the more exposed and more sheltered sides of the plant. Note whether marks occur on one leaf, one branch, or across the canopy.
Then check nearby plumerias if you have them. Similar symptoms on more than one plant are useful information, although they don't establish the cause by themselves.
Examine each leaf without spreading debris
Hold the leaf steady and look at its upper surface first. Turn it over without shaking it, then inspect the underside in good light. Photograph any raised areas before touching them.
If you handle a suspicious leaf, wash your hands before inspecting another plant. Avoid rubbing multiple leaves with the same cloth, since loose material can move between surfaces. You don't need to strip the plant to begin an inspection.
Follow the spots over time
One inspection gives you a snapshot. A second look can show whether you're dealing with a stable mark, new damage, or a broader change in the plant.
Take clear photos of the same branch and leaf surfaces a few days apart. Include a wider view of the canopy so you can compare leaf coverage as well as individual marks. Record the date and note whether you see new spots, additional affected leaves, or more powdery material.
A damaged leaf won't necessarily regain its original appearance after the cause is addressed. For that reason, pay attention to the condition of other leaves and any new growth as well as the original spot.
If the pattern remains unclear, keep the photos and seek a diagnosis rather than treating every change as plumeria rust. The distinction matters because a fungicide won't correct irrigation damage, spray injury, or other nonfungal problems.
Other causes of marks and discoloration
Several problems can affect the same plumeria, so inspect the surrounding site as well as the foliage. Recent changes can be useful clues, especially when damage appears after outdoor work or an irrigation adjustment.
Water and drainage
Plumerias need drainage around their roots. Check the soil beneath the surface mulch rather than judging moisture by the dry top layer alone. If the soil stays wet long after irrigation or rain, look for a sprinkler spraying too often, runoff collecting in the bed, or a low area where water pools.
Also check whether a sprinkler repeatedly wets the leaves. Adjusting its direction can reduce unnecessary foliage wetness while keeping water directed toward the root zone.
Spray, surface heat, and physical damage
Consider whether cleaners, herbicides, or fertilizer contacted the plant or soil. During paver cleaning, keep wash water away from planting beds. If cleaner splashes on foliage, rinse the affected leaves with clean water without flooding the roots.
Nearby pavement can affect heat and runoff, too. After patio work, look for changes in grade or sprinkler coverage that send water toward the trunk. If a concrete company is working beside an existing bed, protect the plumeria's root area from equipment and excess material.
Insect feeding and rubbing branches can leave marks as well. Look for the insect, damaged tissue, or contact point before choosing a treatment.
What to do when rust is likely
If you find suspicious powdery growth, start with cleanup and conditions around the plant. These steps can reduce the amount of affected material in the area while you decide whether a closer diagnosis or treatment is needed.
Remove affected leaves carefully
Pick up fallen, suspicious leaves and place them in a bag for disposal. Remove heavily affected attached leaves if you can do so without stripping much of the canopy. Handle them gently to avoid scattering loose material.
Don't remove healthy foliage simply to make the plant look tidy. Leaves help the plant produce energy, and aggressive pruning adds stress. Clean your pruning tools after use, following the disinfectant product's directions.
Reduce repeated leaf wetness
Direct irrigation toward the soil rather than the canopy where practical. Water early enough for splashed foliage to dry during the day, and avoid adding water when the root zone is already wet.
Give the plant room for air to move around its branches. If neighboring shrubs have grown into the plumeria, selective pruning can open space without removing a large amount of foliage at once. These adjustments won't erase existing spots, but they can improve conditions around the plant.
When to consider a fungicide
A fungicide may be an option when rust is likely and symptoms are spreading, particularly if the plant has valuable foliage you want to protect. First, look for a product labeled for use on plumeria and for the disease being treated. Follow all label directions for application, timing, protective equipment, and re-entry.
Fungicides don't turn damaged tissue healthy again. Depending on the product, they may protect unaffected foliage or limit further disease development. Starting with a clear diagnosis helps you avoid applying a product that won't address the real problem.
Keep spray and rinse water away from ponds, canals, and storm drains. Avoid spraying when wind could carry the product onto people, pets, nearby plants, or hard surfaces. If you're uncomfortable applying it, a licensed pest professional can assess the plant and discuss labeled options.
Don't mix household chemicals or apply an improvised treatment. Even a product described as natural can injure leaves if it isn't suitable for the plant or is applied incorrectly.
Adjust the landscape around the plant
A healthy planting site makes it easier to care for a plumeria and spot changes early. You don't need to rebuild the entire bed, but a few site details deserve attention.
Keep water moving away from the trunk
After heavy rain, look for standing water and mulch washed against the plant. Clear mulch away from direct contact with the trunk and correct small obstructions that keep water in the bed.
Check irrigation after nearby construction or a change in the landscape layout. A new walkway or section of artificial turf can change how water reaches a planting area. Sprinkler heads may need adjustment if they now spray a wall or miss the soil around the plant.
Leave space for routine inspection
Keep surrounding plants trimmed back enough that you can reach the plumeria without brushing through wet foliage. Good spacing also makes it easier to see fallen leaves and clean them up.
When planning new landscaping, consider the mature size of the plumeria and nearby shrubs. A crowded bed can make watering, pruning, and inspection harder, even when each plant looked appropriately sized at installation.
Avoid adding fertilizer solely to correct spotted leaves. First identify the problem and review the plant's growing conditions. Extra fertilizer won't remove fungal growth or repair a drainage issue, and an excessive application can create another source of stress.
When to get a plant diagnosis
Get help if symptoms continue to spread, the canopy loses substantial foliage, or you can't identify the material on the leaves. A local UF/IFAS Extension office can help direct you to appropriate plant diagnostic resources.
Bring dated photos of the whole plant and close views of both leaf surfaces. Note recent rainfall, irrigation changes, spray applications, and construction. That history can help separate what appeared on the plant from what may have caused it.
If a sample is needed, ask for collection and delivery instructions before cutting it. A clear sample from an actively affected area can be more useful than dry debris gathered long after the symptoms appeared.
Give your plumeria a closer look
The strongest clue to investigate is the combination of leaf marks and visible growth on the leaf surface. Color alone doesn't settle the question, so compare several leaves and track changes before choosing a treatment.
Start with careful cleanup and sensible watering. If the problem spreads or the cause remains uncertain, a plant diagnosis can help you protect the foliage without treating the wrong problem.